Texas Roadhouse Fried Pickles Copycat Recipe
This Texas Roadhouse fried pickles recipe gets you that same thick, tangy, shatteringly crisp coating you get at the restaurant, made in your own kitchen in about 30 minutes. They’re the kind of appetizer that disappears before you even sit down.
Most restaurant versions hide behind a seasoned batter you can’t quite figure out. This one is straightforward, uses pantry staples, and makes enough to feed a crowd.
Why I Love This Recipe
The coating here is the whole point. Buttermilk keeps the batter clinging tight to each pickle slice, and the cayenne in the flour gives it a low, slow heat that builds over a few bites rather than hitting all at once.
The pickles stay briny and cold at the center while the outside fries up crackling and golden. That contrast is what makes these worth making.
This is the version I keep coming back to because the ratio of seasoned flour to pickle is just right. Nothing slides off, nothing turns soggy.
Recipe Ingredients
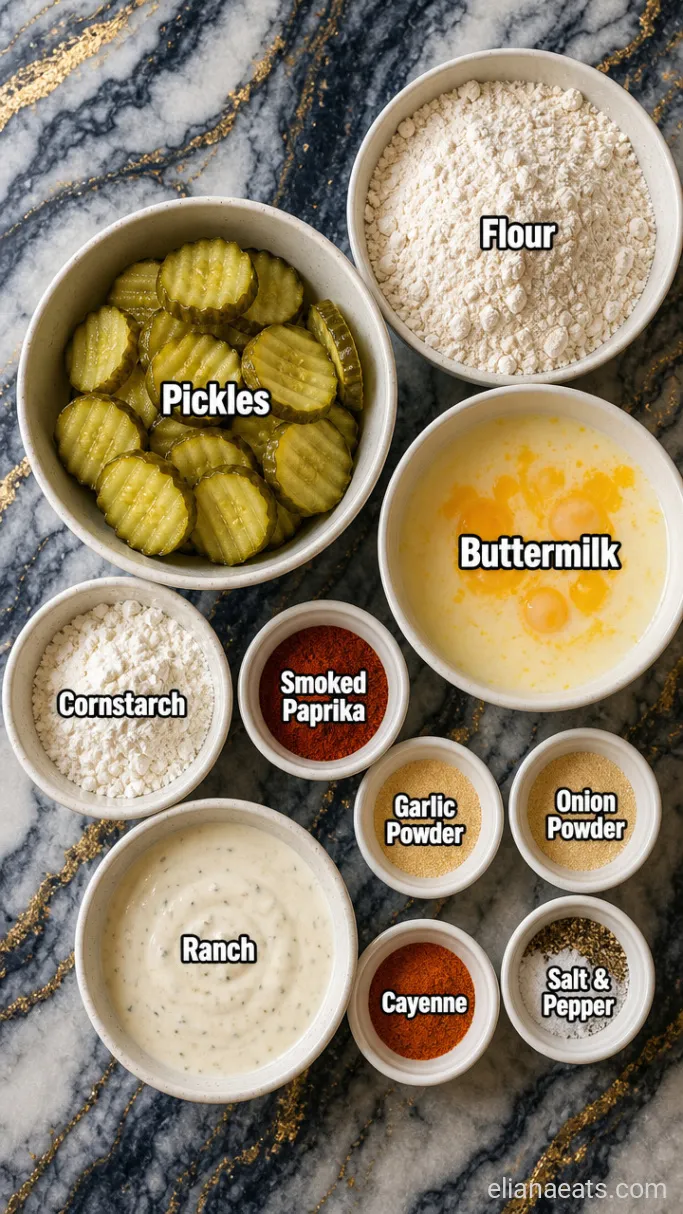
- 2 cups dill pickle slices – Crinkle-cut chips hold the batter better than flat rounds; use a jar that’s already sliced
- 1 cup all-purpose flour – The base of the dry coating; spooned and leveled, not packed
- 2 tbsp cornstarch – Mixed into the flour to help the crust shatter rather than chew
- 1 tsp garlic powder – Adds savory depth to the coating
- 1 tsp onion powder – Rounds out the seasoning alongside the garlic powder
- 1 tsp smoked paprika – Gives the coating a warm, slightly smoky flavor and a reddish color
- 1/2 tsp cayenne pepper – Brings gentle heat; reduce to 1/4 tsp if you want it mild
- 1 tsp salt – For the flour dredge; the pickles are already salty so don’t overdo it
- 1/2 tsp black pepper – Freshly ground if you have it
- 1 cup buttermilk – The acid helps the flour coating stick and adds a slight tang
- 1 large egg – Whisked into the buttermilk to give the batter a little more body
- Vegetable oil for frying – Neutral oil with a high smoke point; canola works too
- 1/2 cup ranch dressing – For serving; the cool creaminess works well against the hot, salty pickles
Variations / Substitutions
- No buttermilk – Stir 1 tbsp white vinegar or lemon juice into 1 cup of whole milk, let it sit for 5 minutes, and it behaves the same way in the batter.
- Air fryer option – Spray the coated pickles with cooking spray and air fry at 400°F (200°C) for 8 to 10 minutes, flipping halfway; the crust won’t be quite as shattery but it still crisps up nicely.
- Extra heat – Swap the smoked paprika for hot smoked paprika and double the cayenne to get a noticeably spicy version.
- Gluten-free – Use a 1-to-1 gluten-free flour blend in place of the all-purpose flour; the texture is slightly denser but still good.
- Different pickle shape – Pickle spears work here too, just add about 1 minute of fry time per batch since they’re thicker.
- Dipping sauce swap – Sub the ranch for a sriracha mayo (equal parts mayo and sriracha) if you want something with more kick.
If you like battered appetizers like this, you might also enjoy a Hooters Buffalo Shrimp Copycat Recipe.
How To Make Fried Pickles
Step 1: Drain and Dry the Pickles
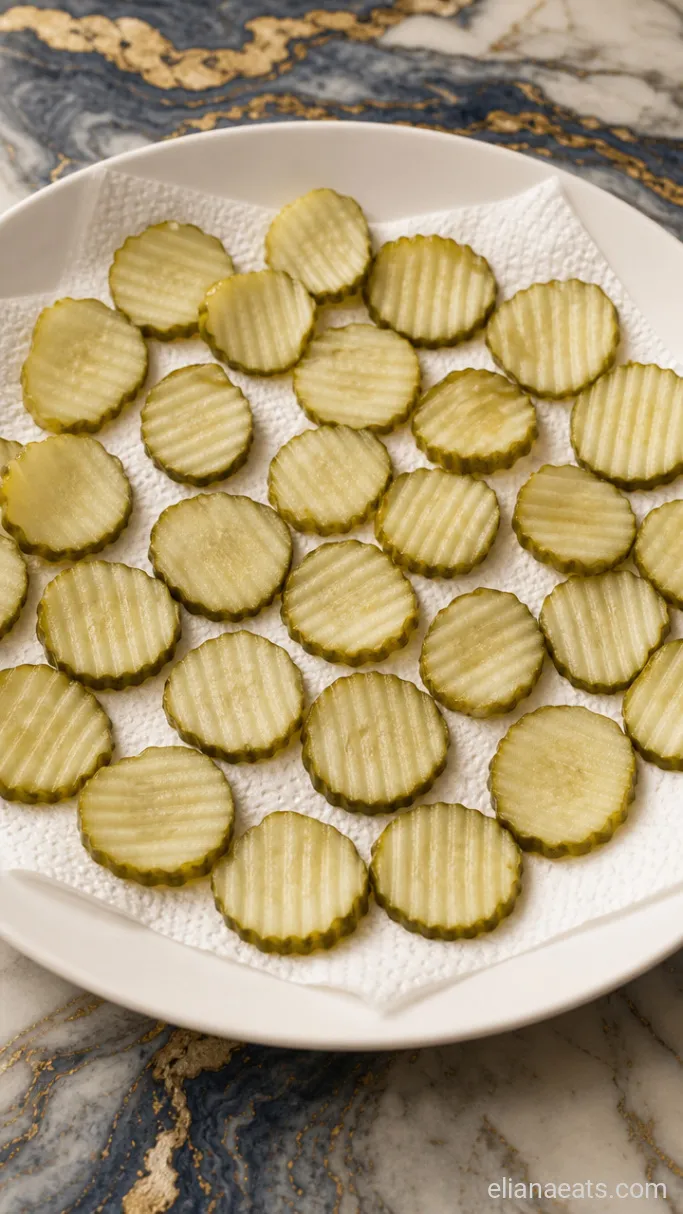
Spread the 2 cups of dill pickle slices on a layer of paper towels and press another layer on top. Let them sit for at least 5 minutes so the surface moisture is gone. Wet pickles push steam through the coating while they fry, and that steam is what makes breading fall off or go soggy.
Pat them again right before you start dredging. They should feel tacky, not wet.
Step 2: Whisk the Dredging Flour
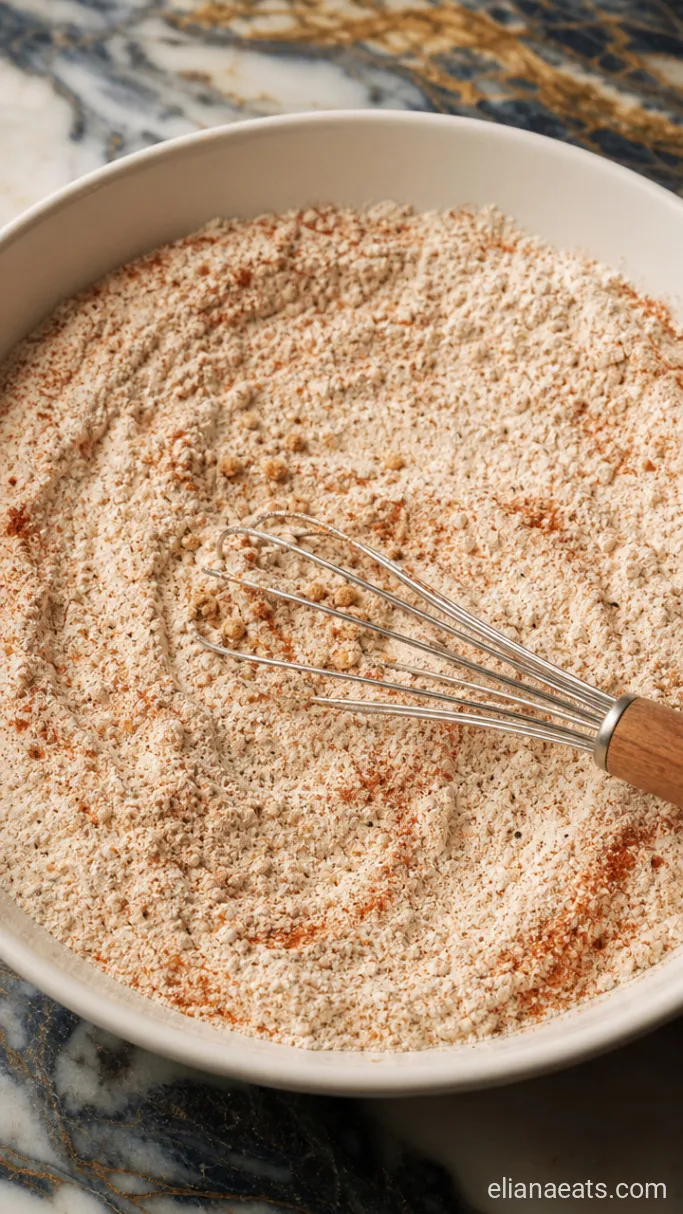
In a wide, shallow bowl, whisk together the 1 cup all-purpose flour, 2 tbsp cornstarch, 1 tsp garlic powder, 1 tsp onion powder, 1 tsp smoked paprika, 1/2 tsp cayenne, 1 tsp salt, and 1/2 tsp black pepper until the spices are fully blended into the flour. In a separate bowl, whisk the 1 cup buttermilk with the 1 large egg until smooth.
Keep the two bowls side by side. Having everything within arm’s reach before the oil heats up makes the process a lot less chaotic.
Step 3: Heat the Oil
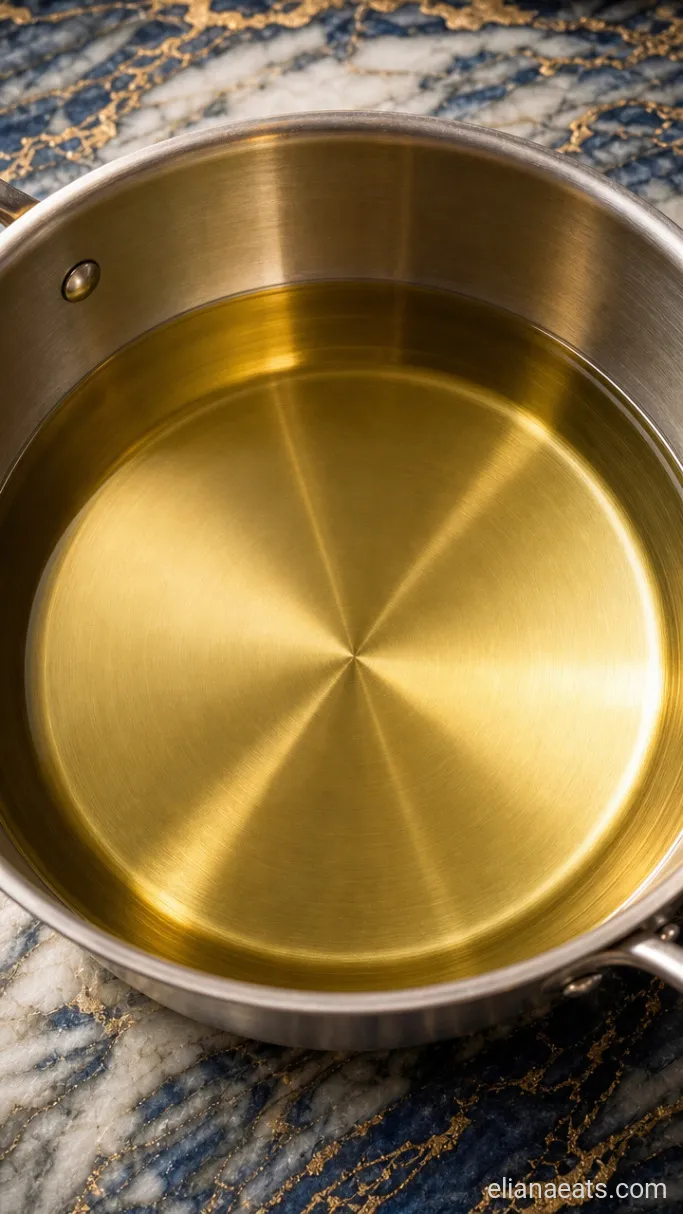
Pour enough vegetable oil into a deep skillet or heavy-bottomed pot to reach a depth of about 2 inches. Set the heat to medium-high and bring the oil to 375°F (190°C). Use a thermometer if you have one. If you don’t, drop a small pinch of flour in. It should sizzle immediately and float up within a couple of seconds.
Keep the heat steady throughout frying. If the oil drops below 350°F (175°C) between batches, the coating absorbs more fat before it sets, and you end up with something heavy instead of crisp.
Step 4: Coat the Pickle Slices
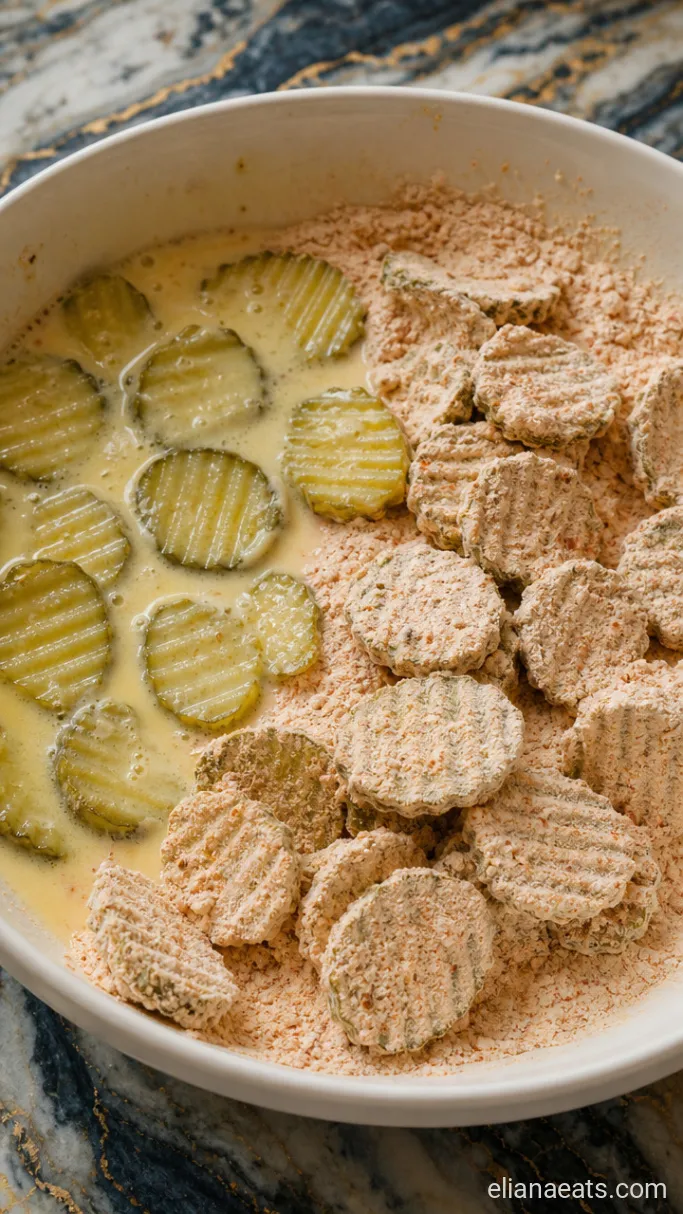
Working in small batches, dip each dried pickle slice into the buttermilk mixture, let the excess drip off for a second or two, then press it into the seasoned flour. Flip it, press again, and shake off any loose flour. A thin, even coat gives you a crispier result than a thick clumpy one.
Set the coated slices on a wire rack or a plate while you finish the batch. Don’t stack them or they’ll stick together and the coating will smear off.
Step 5: Fry Until Golden and Crackling
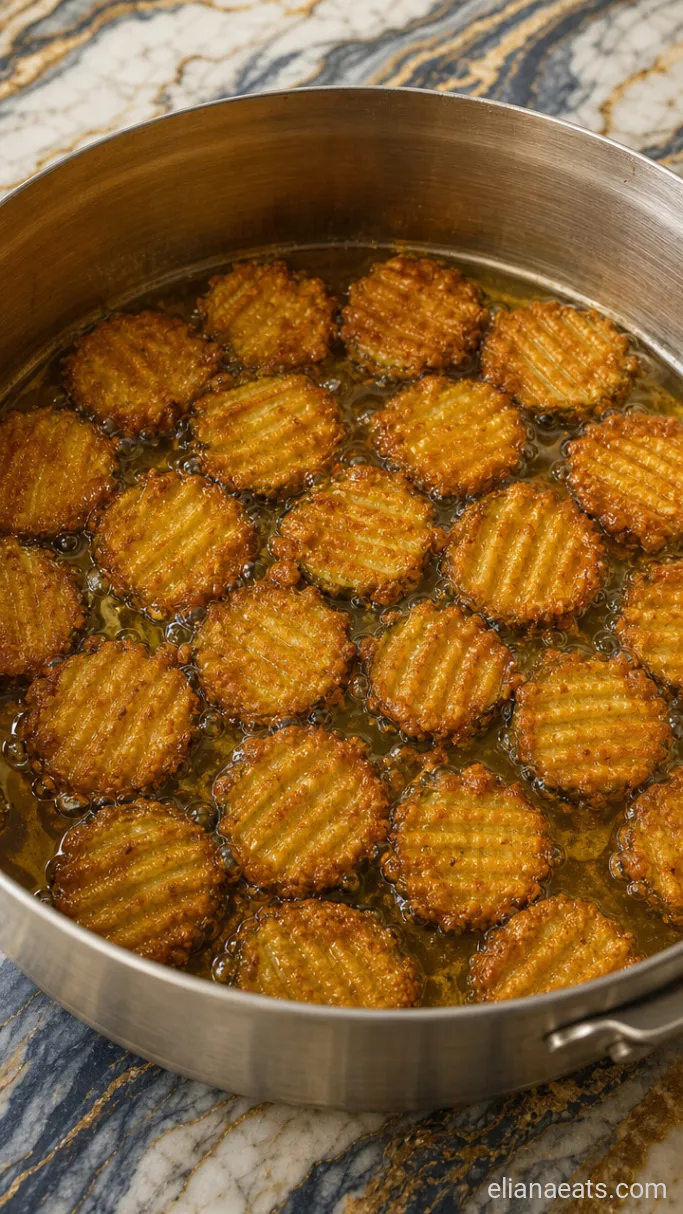
Carefully lower 8 to 10 coated pickle slices into the hot oil at once. Don’t crowd the pan; work in batches of that size even if your pan looks like it could hold more. Fry for 2 to 3 minutes, flipping once at about the 1-minute mark, until the coating is deep golden and the surface looks dry and cratered rather than shiny.
The sizzling will get noticeably quieter as the moisture cooks out. That sound change is one of the best cues that they’re nearly done. Lift them out with a slotted spoon or spider and set them on a paper-towel-lined plate. Let the oil return to 375°F before the next batch.
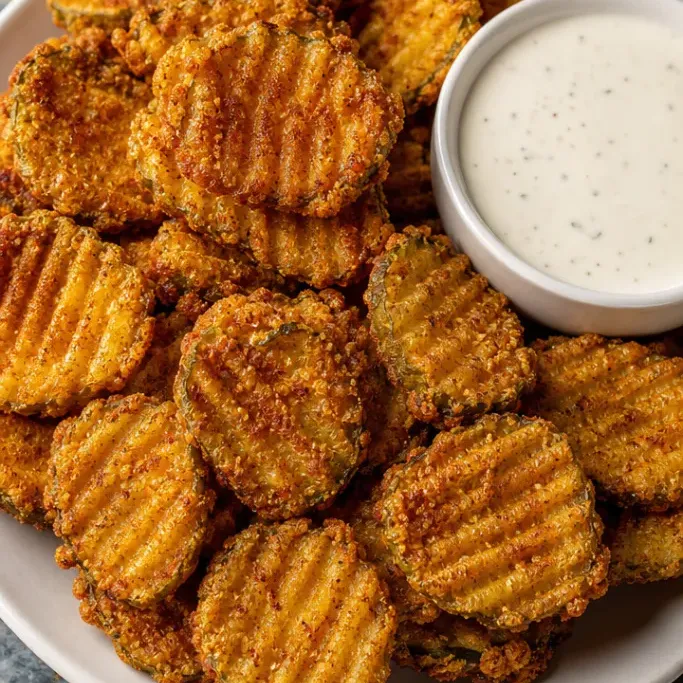
Step 6: Plate and Serve with Ranch
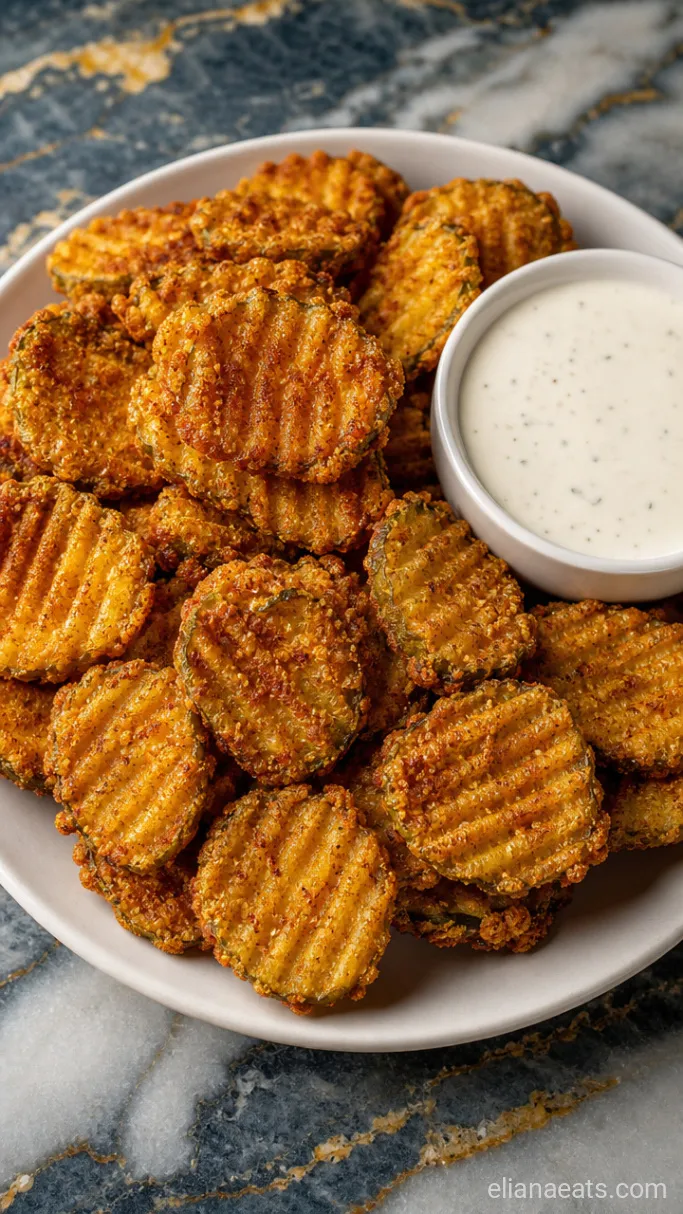
Transfer the fried pickles to a serving plate or basket lined with a fresh paper towel, then pull that towel away before you bring them to the table so the bottoms stay crisp rather than steaming against the paper. Arrange them in a loose pile, spoon the 1/2 cup ranch dressing into a small bowl alongside, and scatter a pinch of smoked paprika over the top for color.
Recipe Tips
- Slice thickness matters. Pickles that are cut too thin will fry through completely and lose their cool, tangy center. Look for slices that are at least 1/4 inch thick, which most jarred crinkle-cut chips already are.
- Rest time between batches. Let the oil come fully back to 375°F (190°C) between each batch. A thermometer takes the guesswork out and keeps every batch consistent.
- Dry hands or wet hands, not both. Use one hand to dip pickles in the buttermilk and the other hand to press them into the flour. Switching back and forth creates clumps on your fingers that end up on the pickles.
- Serve immediately. These are at their best the moment they come out of the oil. Even 10 minutes of sitting makes the coating soften noticeably, so have everyone at the table before you fry the last batch.
Fry times by batch size and oil depth:
| Oil Depth | Batch Size | Fry Time Per Side |
|---|---|---|
| 1.5 inches | 6 to 8 slices | 1.5 minutes |
| 2 inches | 8 to 10 slices | 1 to 1.5 minutes |
| 2.5 inches | 10 to 12 slices | 1 minute |
What To Serve With Fried Pickles
These work best as a starter alongside something cold to drink, but they can also sit next to a burger or a pulled pork sandwich without fighting for attention. A cold, creamy coleslaw provides textural contrast since the pickles are hot and crunchy while good slaw is cool and a little sweet. If you’re serving these as part of a bigger spread, a plate of celery and carrot sticks next to the ranch gives people something to snack on while they wait for the next batch to fry.
Frequently Asked Questions
Can I make the batter ahead of time?
Yes. Mix the dry flour blend and keep it in a sealed container at room temperature for up to 24 hours. Whisk the buttermilk and egg together no more than a few hours ahead and refrigerate it until you’re ready to fry.
Why is my coating falling off during frying?
The pickles almost certainly had too much surface moisture before dredging. Even a few extra minutes of patting with paper towels makes a real difference.
Can I use sweet pickles instead of dill?
You can, but the sugar in sweet pickles causes the coating to brown faster than the inside heats through, so watch the color closely and pull them at the 1.5-minute mark per side.
How do I know the oil is hot enough without a thermometer?
Drop a small pinch of the flour mixture into the oil. If it sizzles and floats to the surface within 2 seconds, the oil is ready. If it sinks and sits there, give it another 2 minutes.
—
Ingredients
Method
- Spread the pickle slices on paper towels and press dry. Let them sit for 5 minutes, then pat again until the surface feels tacky, not wet.
- Whisk the flour, cornstarch, garlic powder, onion powder, smoked paprika, cayenne, salt, and black pepper together in a wide shallow bowl. In a separate bowl, whisk the buttermilk and egg until smooth.
- Pour vegetable oil into a deep skillet to a depth of 2 inches and heat over medium-high until it reaches 375°F (190°C).
- Working in batches, dip each pickle slice into the buttermilk mixture, let the excess drip off, then press it into the seasoned flour on both sides and shake off any loose coating. Set on a wire rack while you coat the rest of the batch.
- Lower 8 to 10 coated pickle slices into the hot oil. Fry for 2 to 3 minutes total, flipping once at the 1-minute mark, until deep golden all over. Transfer to a paper-towel-lined plate and let the oil return to 375°F before the next batch.
- Move the fried pickles to a serving plate, remove the paper towel so the bottoms stay crisp, add a pinch of smoked paprika over the top, and serve immediately with the ranch dressing on the side.