Starbucks Vanilla Syrup Recipe (Easy Copycat in 3 Ingredients)
This Starbucks vanilla syrup recipe takes 10 minutes and 3 ingredients, and it tastes just like the one they pump into your latte every morning. If you go through a bottle of the store-bought stuff every couple of weeks, making it at home will save you real money.
It keeps in the fridge for a month and works in coffee, iced tea, lemonade, or anything else you’d normally sweeten.
Why I Love This Recipe
The syrup is clean and straightforward: sweet, faintly floral, with that warm vanilla note that makes a plain latte actually interesting. The sugar dissolves into a smooth liquid that mixes into cold drinks without any gritty sediment at the bottom of your glass.
It’s also easy to scale. Make a small batch to test it, or double it and keep a big jar in the fridge all month.
Recipe Ingredients
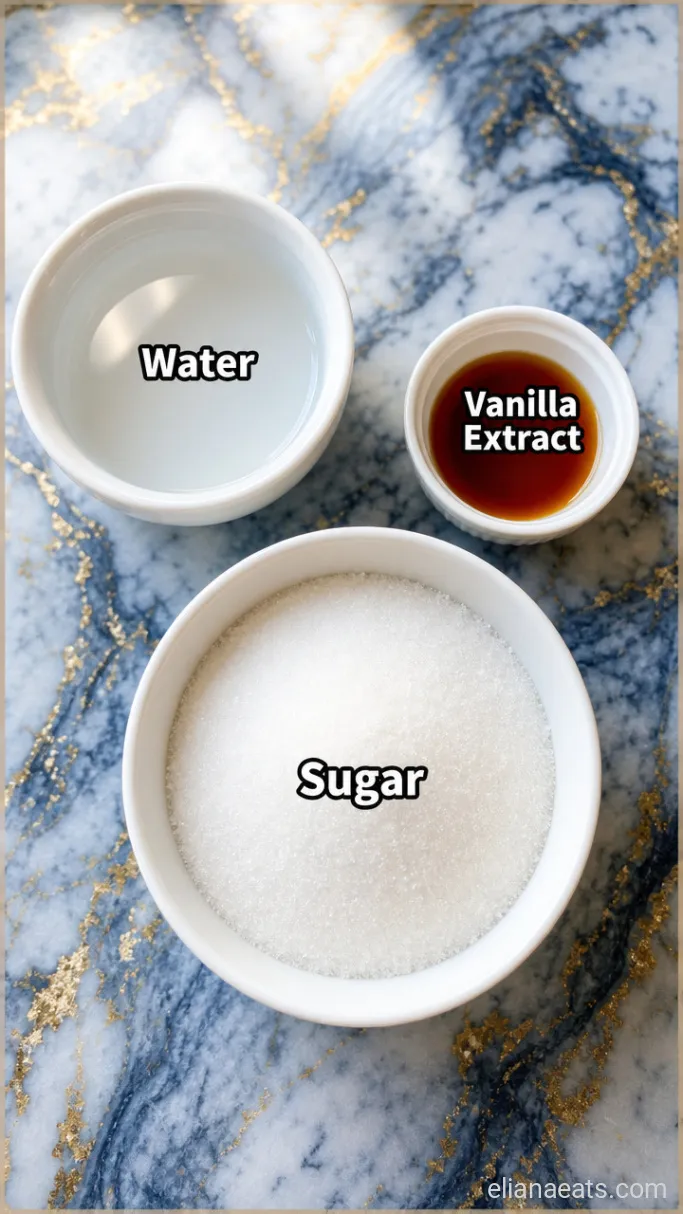
- 1 cup granulated white sugar – White sugar gives you the clearest, lightest syrup; raw sugar works but adds a slight caramel tint
- 1 cup water – Filtered water gives the cleanest flavor, but tap is fine
- 1 tsp pure vanilla extract – Use pure, not imitation; the difference is noticeable in something this simple
Variations / Substitutions
- Brown sugar – Makes a slightly deeper, more caramel-forward syrup that works well in iced coffee.
- Honey – Use 3/4 cup honey in place of the sugar; the syrup will taste floral and pair well with tea or milk-based drinks.
- Vanilla bean – Split 1 vanilla bean and scrape the seeds into the water with the pod before heating; the result has visible specks and a richer, more complex flavor.
- Sugar-free (erythritol) – Erythritol dissolves well and keeps the syrup clear, though it can leave a slight cool aftertaste.
- Coconut sugar – Works fine but produces a darker amber syrup with a toasty flavor, closer to a brown sugar vanilla.
If you enjoy making your own coffee shop syrups at home, you might also like a Starbucks Hazelnut Syrup Copycat Recipe.
How To Make Vanilla Syrup
Step 1: Dissolve the Sugar in Water
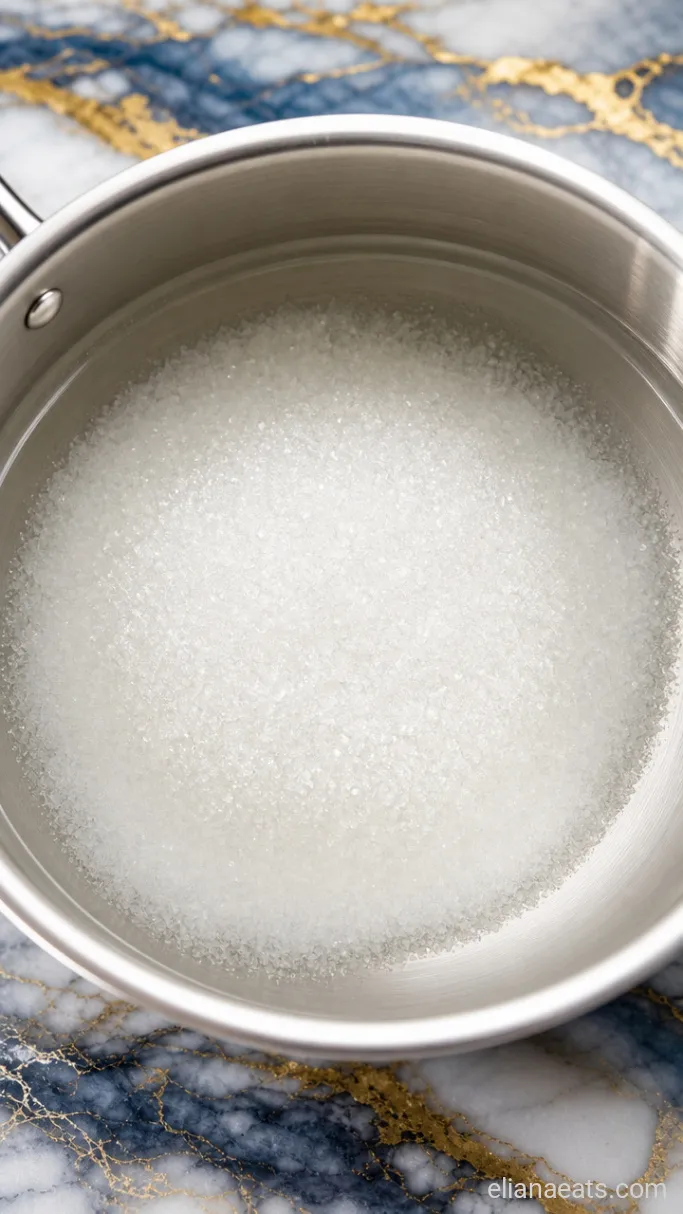
In a small saucepan over medium heat, combine the 1 cup granulated white sugar and 1 cup water. Stir frequently with a spoon or silicone spatula as the mixture heats. Keep stirring until you can no longer see any sugar granules, about 3 to 4 minutes. You do not need to bring this to a rolling boil.
Once the liquid looks completely clear and the granules are gone, you’re at the right point. The surface may look slightly glossy.
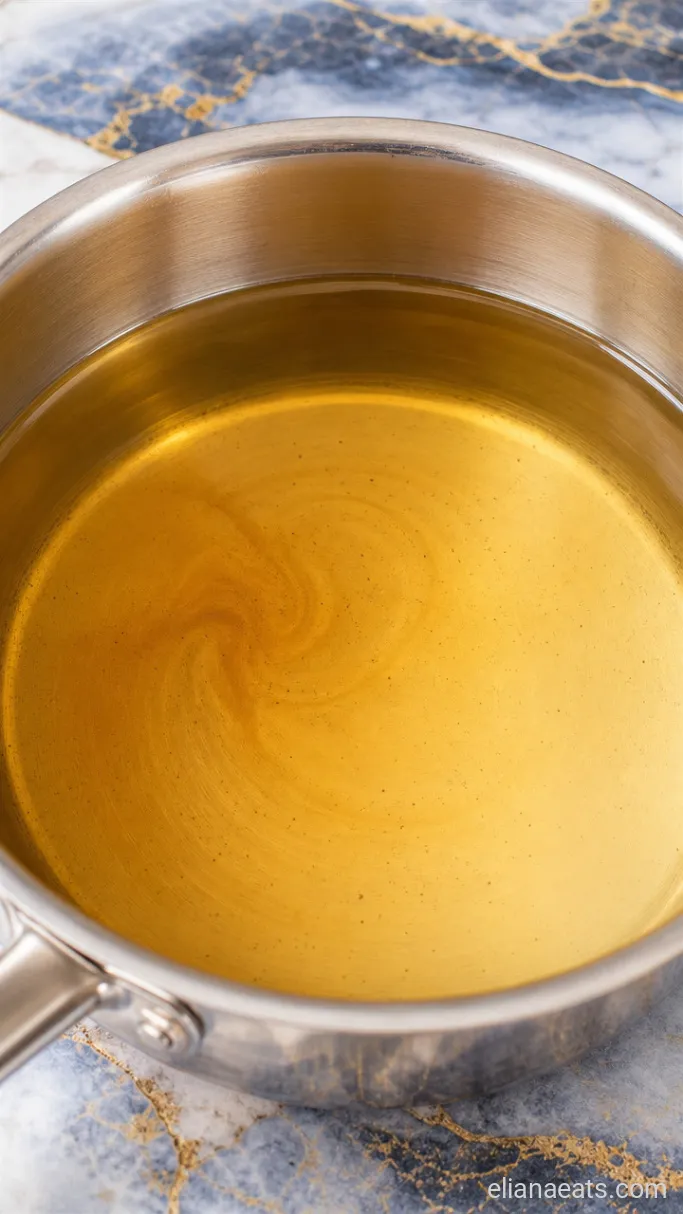
Step 2: Simmer the Syrup
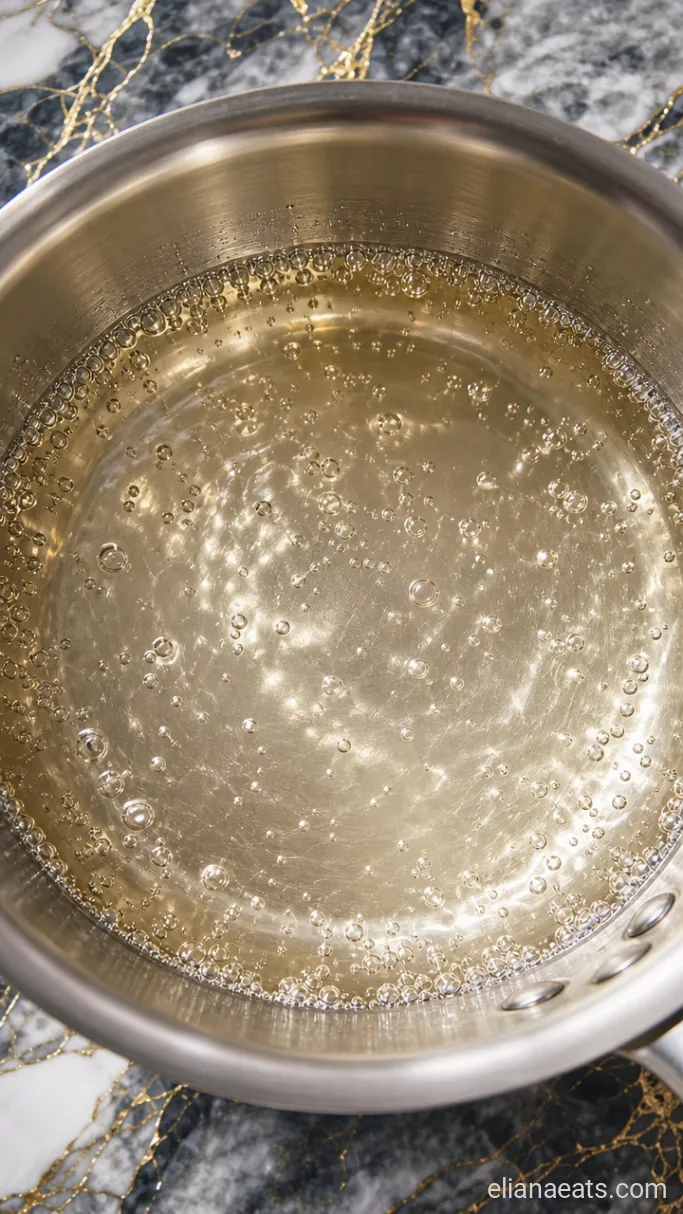
Reduce the heat to medium-low and let the syrup simmer gently for 5 minutes without stirring. The liquid will stay clear and thin at this stage, which is exactly what you want for a pourable coffee syrup, not a thick candy sauce.
Watch the heat here. If you push it too high, the syrup can start to color around the edges of the pan, which means the sugar is beginning to caramelize. You want it to stay pale and clear.
Step 3: Stir in the Vanilla and Cool
Remove the pan from the heat and stir in the 1 tsp pure vanilla extract. The vanilla will bloom in the warm syrup and smell strong right away. Give it a good 30-second stir so it’s fully incorporated.
Let the syrup cool in the pan for 10 to 15 minutes before transferring it to a glass jar or bottle. Pouring boiling liquid into a cold glass jar is a crack risk, so a few minutes of cooling is worth it.
Step 4: Pour into a Jar and Serve
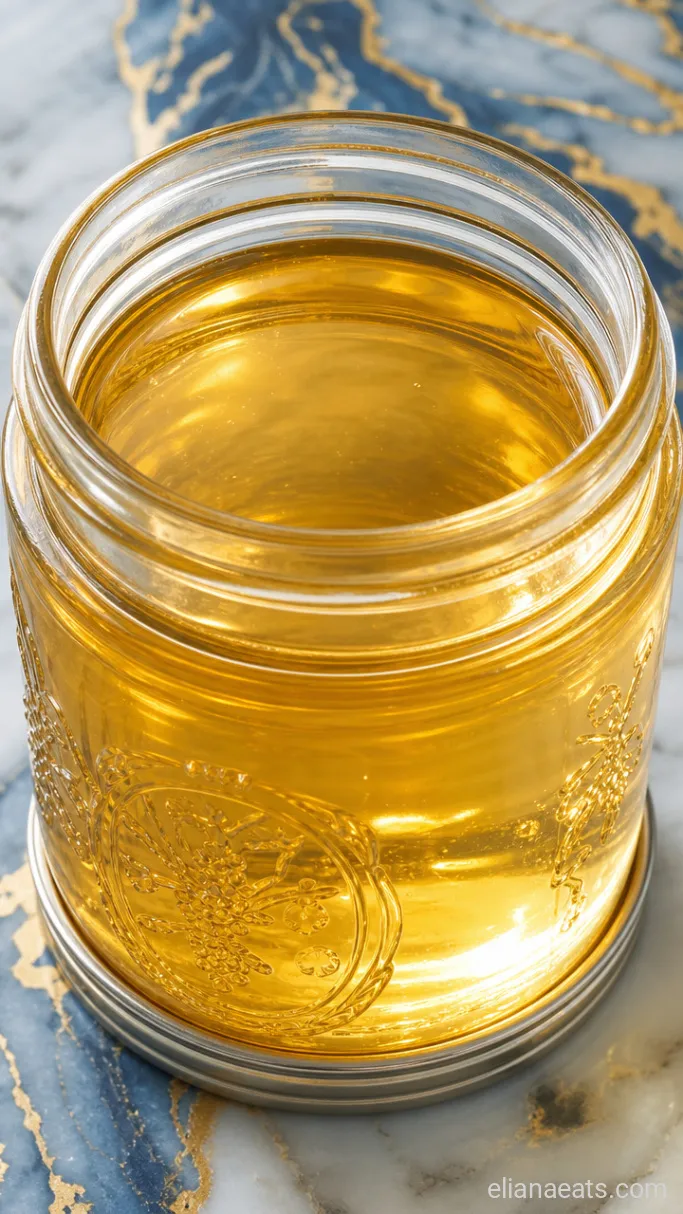
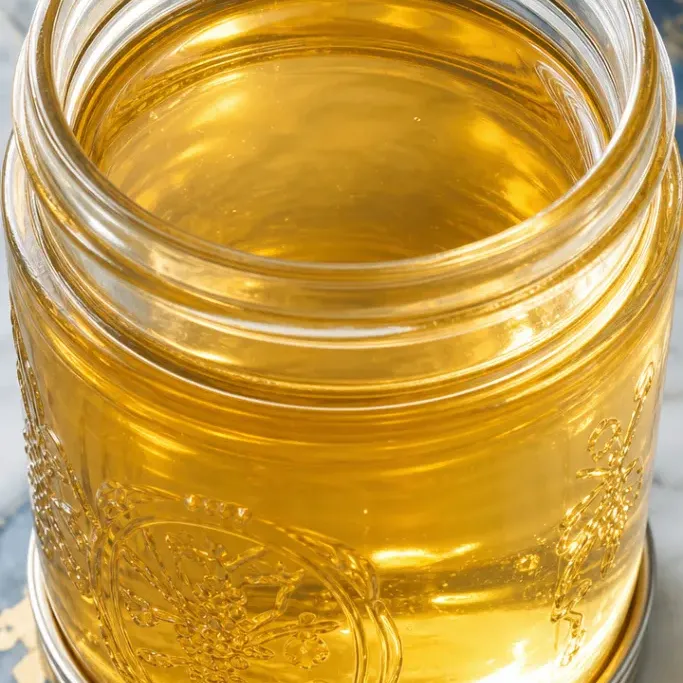
Pour the cooled vanilla syrup into a clean glass jar or bottle with a tight-fitting lid. The syrup will be pale golden and thin, easy to pour or pump. Add 1 to 2 tbsp to a hot or iced drink, stir, and taste before adding more.
Recipe Tips
- Use pure vanilla extract, not vanilla flavoring. Vanilla flavoring uses synthetic vanillin, which turns a bit sharp in concentrated syrups. Pure extract is worth it here.
- A 1:1 sugar-to-water ratio is the standard. This gives you a pourable syrup, not a thick one. If you want a richer, sweeter syrup (closer to what goes into Starbucks Frappuccinos), use a 2:1 ratio instead.
- Don’t skip the cooling time before bottling. Even 10 minutes at room temperature makes the syrup safe to pour into glass. A sudden temperature change can crack a jar.
- Label your jar with the date. It genuinely helps — a month goes by fast and homemade syrup has no preservatives.
Cook times by heat level and batch size:
| Batch Size | Sugar | Water | Simmer Time |
|---|---|---|---|
| Small | 1/2 cup | 1/2 cup | 3 to 4 mins |
| Standard | 1 cup | 1 cup | 5 mins |
| Double | 2 cups | 2 cups | 6 to 7 mins |
How To Store
- Refrigerate – Store in a sealed glass jar or bottle for up to 4 weeks. The syrup stays pourable straight from the fridge.
- Serve Cold – It mixes well into cold drinks straight from the fridge without needing to be reheated.
Frequently Asked Questions
Can I make this syrup ahead of time for a party or large batch of drinks?
Yes. The syrup keeps for 4 weeks refrigerated, so you can make a double batch several days ahead with no loss in flavor or texture.
Why did my syrup turn cloudy after refrigerating?
Cloudiness usually means the vanilla extract dispersed unevenly before the syrup was fully cooled. Give the cold jar a quick shake and it should clear up in a few seconds.
How many pumps does Starbucks use, and how do I replicate that at home?
Starbucks uses 3 pumps of vanilla syrup for a tall latte, which is roughly 1.5 tbsp. Start with 1 tbsp at home, taste, and adjust from there since pump volumes vary.
Can I use vanilla paste instead of vanilla extract?
Yes, and it’s a good swap. Use the same amount, 1 tsp vanilla paste. The syrup will have a stronger vanilla flavor and visible seed specks.
Ingredients
Method
- Combine the 1 cup sugar and 1 cup water in a small saucepan over medium heat, stirring frequently until the sugar fully dissolves, about 3 to 4 minutes.
- Reduce heat to medium-low and simmer without stirring for 5 minutes, keeping the syrup pale and clear.
- Remove from heat, stir in the 1 tsp vanilla extract, and let cool in the pan for 10 to 15 minutes.
- Pour into a clean glass jar or bottle, add 1 to 2 tbsp per drink, and serve.