Cracker Barrel Baked Apples Copycat Recipe
Cracker Barrel baked apples are one of those sides that make you pause mid-bite and wonder why you don’t make something this good at home. The restaurant version is tender, warmly spiced, and just sweet enough to sit alongside a savory breakfast or stand alone as dessert.
This copycat gets you there in about 35 minutes with ingredients you likely already have.
Why I Love This Recipe
The cinnamon and brown sugar soak into the apple as it bakes, so every forkful has that sticky, caramel-edged sweetness without being heavy.
It works at breakfast next to scrambled eggs or at dinner under a scoop of vanilla ice cream. That kind of flexibility is rare for a recipe this simple.
This is the version I keep coming back to, mostly because the apples stay tender but hold their shape instead of collapsing into mush.
Recipe Ingredients
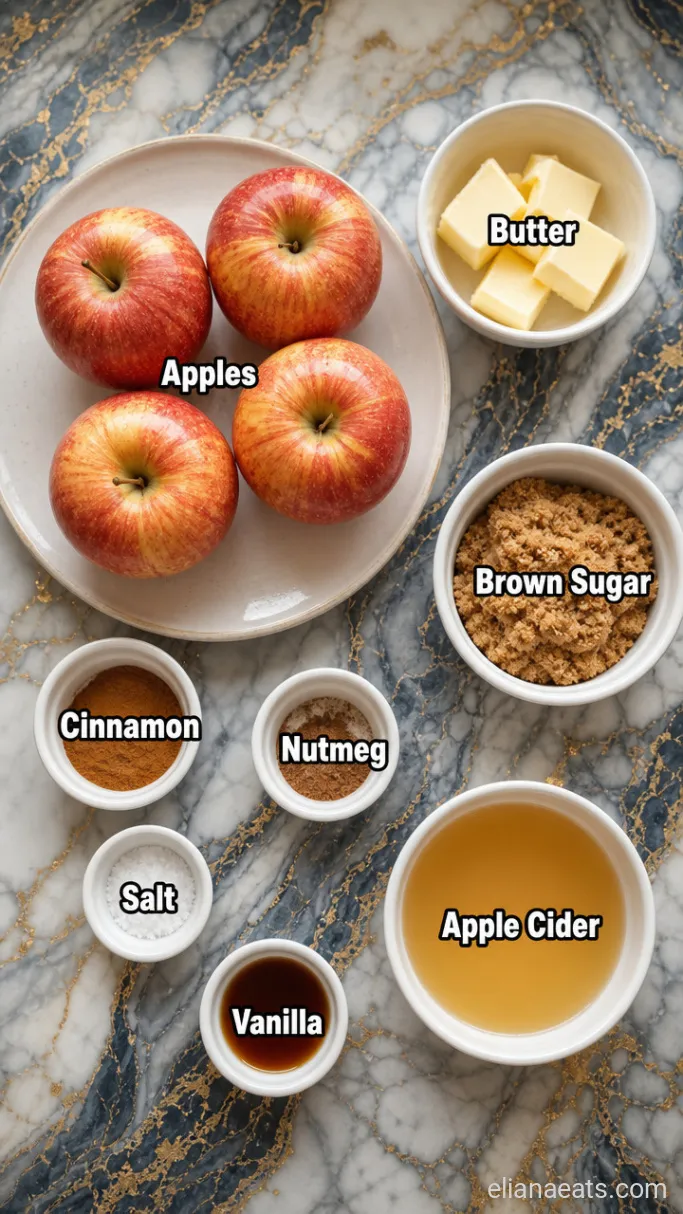
- 4 medium Gala or Fuji apples – Firm, sweet varieties that hold up during baking without falling apart
- 4 tbsp unsalted butter – Cut into small pieces so it melts evenly over each apple
- 4 tbsp brown sugar – Light or dark both work; dark gives a deeper molasses note
- 1 tsp ground cinnamon – The backbone of the spice flavor here
- 1/4 tsp ground nutmeg – Adds warmth; freshly grated is noticeably better
- 1/4 tsp salt – Balances the sweetness and keeps the filling from tasting flat
- 1/4 cup apple cider or apple juice – Goes into the baking dish to create steam and a light syrup
- 1 tsp vanilla extract – Stirred into the cider before pouring; rounds out the sweetness
Variations / Substitutions
- Granny Smith apples – Tarter flavor and firmer texture; add an extra 1/2 tbsp brown sugar per apple to compensate for the acidity.
- Honeycrisp apples – Slightly looser texture when baked but a more complex, floral sweetness.
- Maple syrup instead of brown sugar – Use 1 tbsp maple syrup per apple drizzled over the top; the caramel notes are a little subtler but still great.
- Coconut oil instead of butter – Works for a dairy-free version; the filling will be slightly less rich.
- Pumpkin pie spice instead of cinnamon and nutmeg – Use 1 tsp total and it brings in a little ginger and clove as well.
- Lemon juice instead of apple cider – Use 2 tbsp lemon juice topped up with 2 tbsp water; it brightens the syrup and cuts the sweetness slightly.
If you like warm spiced fruit desserts, you might also enjoy a classic apple crisp recipe.
How To Make Baked Apples
Step 1: Core and Fill the Apples
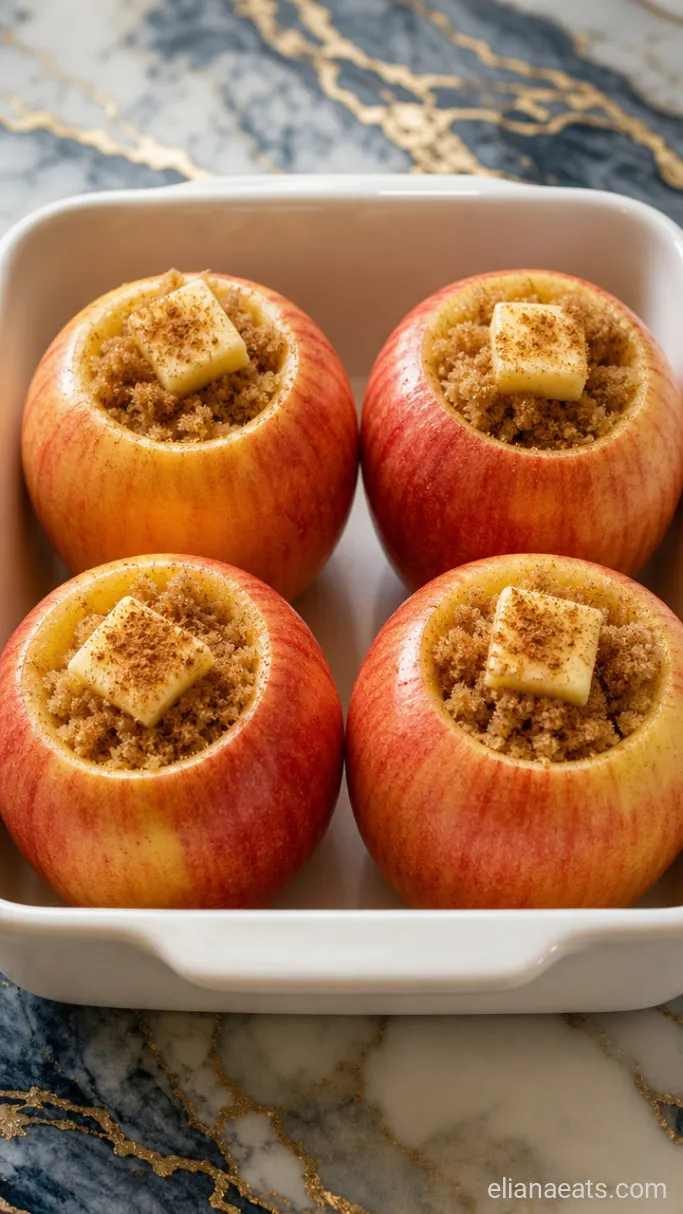
Preheat your oven to 375°F (190°C), then get straight to work on the apples. Wash the 4 medium apples and core each one from the top, stopping about half an inch from the bottom so the filling has a floor to sit in. A melon baller or a sturdy teaspoon works well here. Place the cored apples in a snug baking dish, standing upright.
Mix together the 4 tbsp brown sugar, 1 tsp ground cinnamon, 1/4 tsp ground nutmeg, and 1/4 tsp salt in a small bowl. Spoon the mixture evenly into each cavity, packing it in gently. Then divide the 4 tbsp butter into small pieces and tuck them on top of the sugar mixture in each apple.
The apples should look generously filled at this point, with the butter sitting right on top of the spiced sugar. That layering matters because the butter melts down through the sugar as it bakes, creating a syrup inside the apple rather than just a dry spice coating.
Step 2: Pour the Cider and Bake
Stir the 1 tsp vanilla extract into the 1/4 cup apple cider, then pour the mixture into the bottom of the baking dish around the apples. Cover the dish tightly with foil.
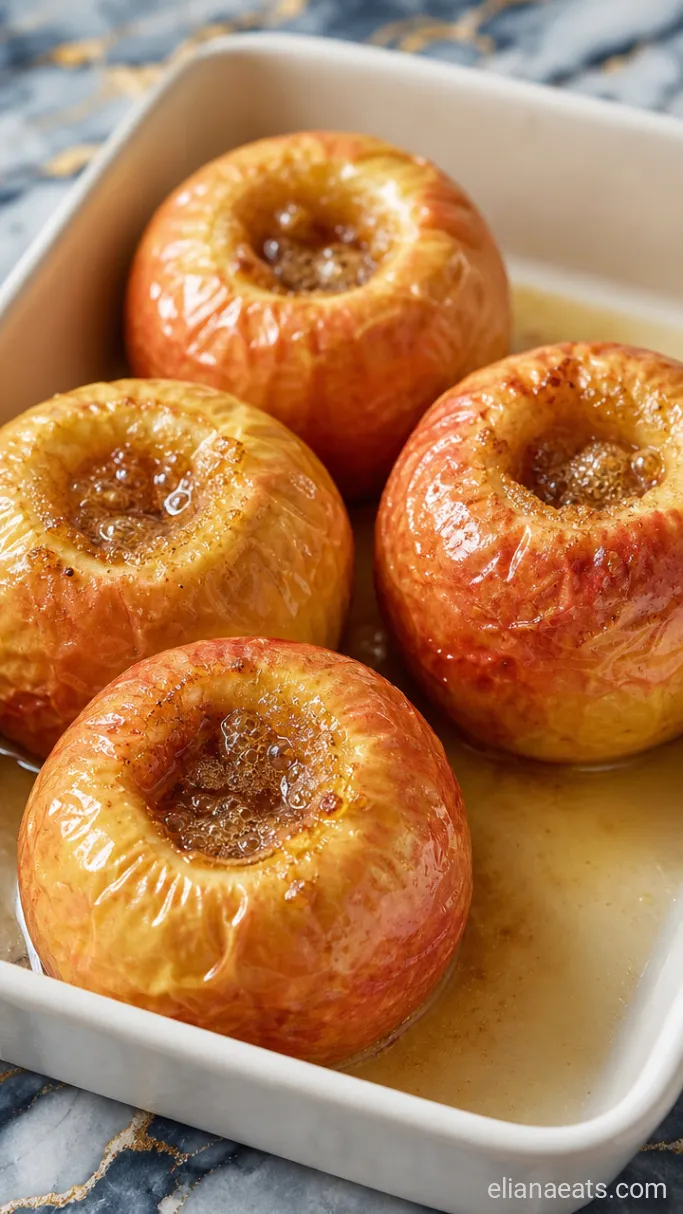
Slide the dish into the 375°F (190°C) oven and bake for 20 minutes covered. Then remove the foil and bake for another 10 to 15 minutes, until the apples are tender when pierced with a knife but still holding their shape. The skin will look a little wrinkled and the liquid in the bottom of the dish will have reduced into a thin, amber syrup.
Do not skip the covered portion of the bake. The steam from the cider is what gets the apple flesh soft all the way through before the outside has a chance to brown too fast.
Step 3: Plate and Glaze the Apples
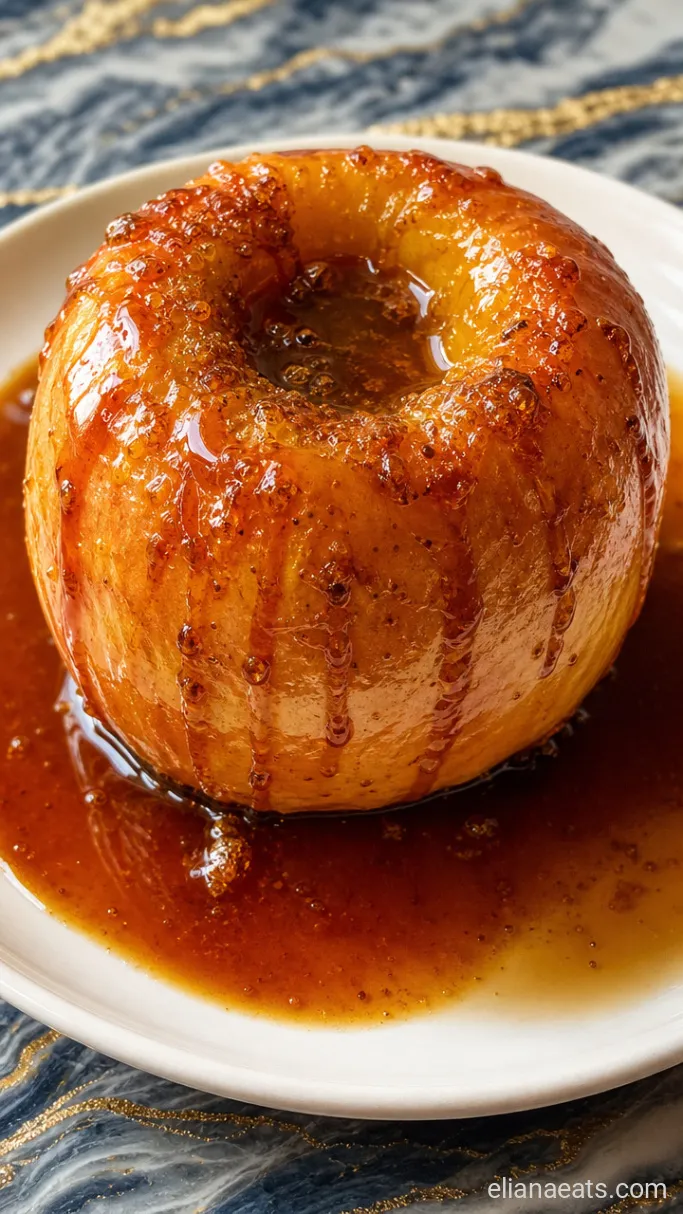
Once the apples are out of the oven, use a large spoon to baste each one with the syrup that has collected in the bottom of the dish. Do this 2 or 3 times, letting the syrup run back into the cavities and coat the outside.
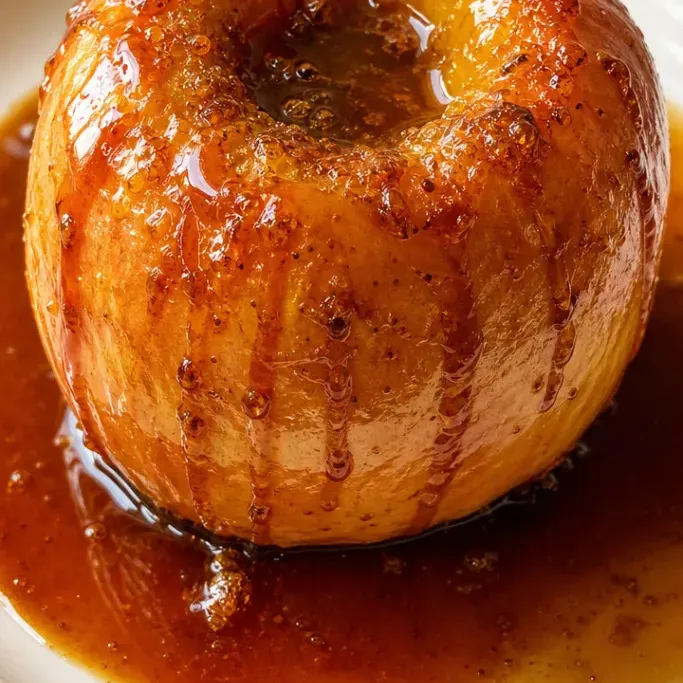
Transfer each apple to a serving plate or shallow bowl, then spoon an extra drizzle of the pan syrup over the top so it pools around the base. The apples should be glistening, amber at the edges, and fragrant with cinnamon.
Recipe Tips
- Choose apples that are similar in size so they finish baking at the same time. One small apple surrounded by large ones will overcook while the others are still firm.
- Do not core all the way through the apple. That base is what holds the butter and sugar inside while everything melts together. If you accidentally pierce it, you can still bake the apple but lay a small piece of foil under the opening.
- The syrup thickens as it cools, so if you are plating right out of the oven, it will look thin. Wait 3 to 4 minutes before spooning it over the apples and it will cling better.
- Leftovers reheat well in a 300°F (150°C) oven for 10 minutes or in the microwave for about 90 seconds. Spoon any syrup from the dish over them before reheating so they do not dry out.
Bake times by pan size (375°F / 190°C, covered 20 mins then uncovered):
| Pan Size | Apple Count | Uncovered Time |
|---|---|---|
| 8×8 inch | 4 apples | 10 to 15 mins |
| 9×13 inch | 6 to 8 apples | 12 to 16 mins |
| Individual ramekins | 1 apple each | 8 to 12 mins |
How To Store
- Refrigerate – Let the apples cool completely, then transfer them to an airtight container with the syrup spooned over them. They keep well for up to 3 days.
- Reheating – Warm in a 300°F (150°C) oven for 10 minutes or microwave on medium power for about 90 seconds. Spoon any stored syrup back over the top before serving.
What To Serve With Baked Apples
A scoop of vanilla ice cream is the obvious move, but the reason it works is contrast: the cold, creamy fat against the warm, sticky apple slows the sweetness down and makes each bite more interesting. Unsweetened whipped cream does the same job with less richness.
For breakfast, these sit well next to a dense, salty side like thick-cut bacon or a fried egg. The fat and salt pull the apple away from feeling like dessert and make the whole plate feel balanced.
Frequently Asked Questions
Can I make these baked apples ahead of time?
Yes. Bake them fully, cool to room temperature, and refrigerate with the syrup. Reheat before serving so the butter and sugar in the filling loosen back up.
Do the apples need to be peeled?
No. The skin helps the apple hold its shape during baking. It softens enough to eat easily and you won’t notice it once the apple is on the plate.
Can I double the recipe?
Yes, use a 9×13 inch baking dish and add 2 to 4 minutes to the uncovered baking time. Check for doneness with a knife rather than relying on the clock alone.
Will this work with pears?
Yes, Bosc pears are the best choice since they stay firm. Start checking them at the 15-minute covered mark because pears tend to soften faster than apples.
Ingredients
Method
- Preheat the oven to 375°F (190°C). Core each apple from the top, leaving a 1/2-inch base. Place upright in a baking dish.
- Mix the 4 tbsp brown sugar, 1 tsp cinnamon, 1/4 tsp nutmeg, and 1/4 tsp salt. Spoon into each apple cavity and top each with equal portions of the 4 tbsp butter.
- Stir the 1 tsp vanilla extract into the 1/4 cup apple cider and pour around the apples. Cover tightly with foil and bake for 20 minutes.
- Remove the foil and bake for another 10 to 15 minutes, until the apples are tender when pierced and the pan liquid has reduced to a thin syrup.
- Baste each apple with the pan syrup 2 to 3 times, then transfer to serving plates and drizzle with the remaining syrup.