Cheesecake Factory Red Velvet Cheesecake Copycat Recipe
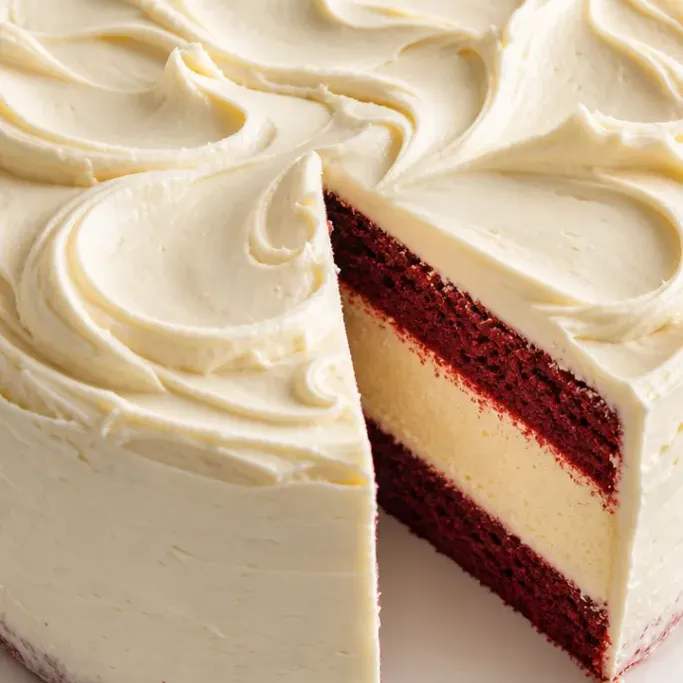
This Cheesecake Factory red velvet cheesecake layers a moist red velvet cake with rich vanilla cheesecake and a cream cheese frosting, all stacked into that dramatic, two-tone slice the restaurant is famous for. It takes a little time, but nothing here is beyond a home kitchen — and the result is genuinely worth the afternoon.
It feeds a crowd, keeps well in the fridge for days, and honestly tastes better the next morning once everything has had time to set. If you have a springform pan and a stand mixer, you are ready to go.
Why I Love This Recipe
The vanilla cheesecake layer is dense and smooth without being heavy, because the sour cream in the batter keeps it from cracking and stays silky even after a night in the fridge.
The red velvet cake underneath gives you that faint cocoa flavor and slightly tender crumb that contrasts nicely against the cool cheesecake. It is not just there for color.
This is the version I keep coming back to when I need something that looks like you spent twice as long on it.
Recipe Ingredients
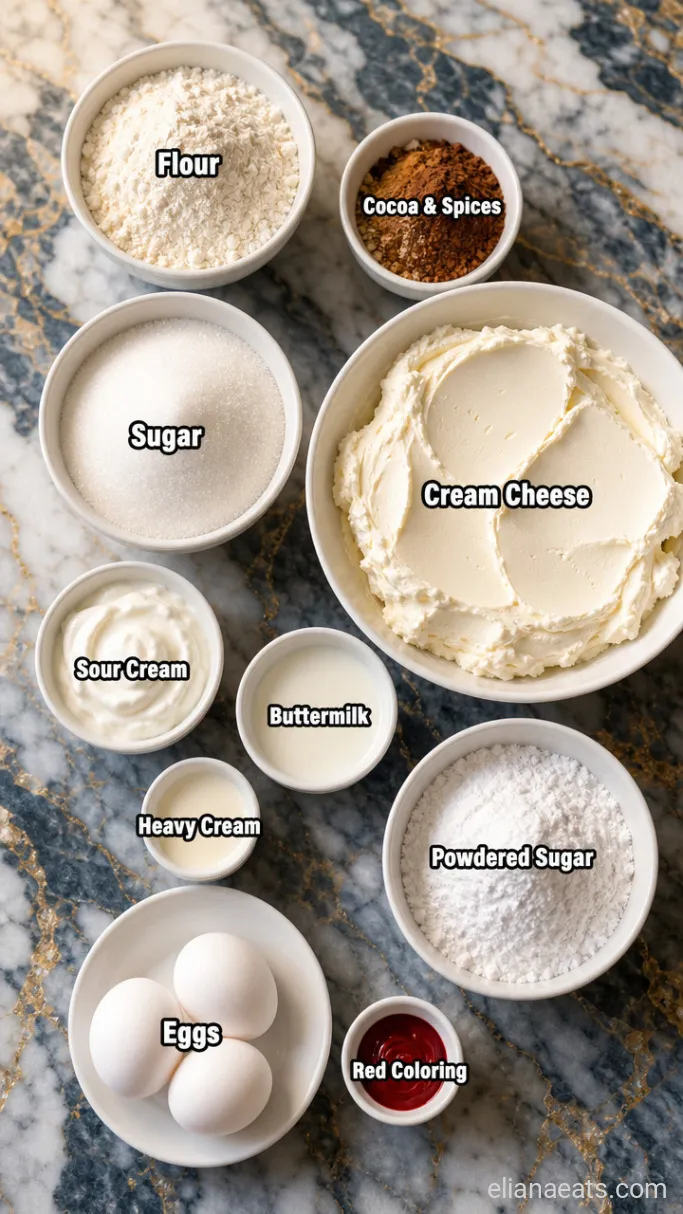
- 2 cups all-purpose flour – Spooned and leveled, not scooped from the bag
- 2 tbsp unsweetened cocoa powder – Dutch-process or natural both work here
- 1 tsp baking soda – Fresh baking soda lifts the cake evenly
- 1/2 tsp salt – Brings out the cocoa
- 1 cup buttermilk – Keeps the crumb tender; whole milk plus 1 tbsp vinegar works as a swap
- 1 tbsp red food coloring – Gel coloring gives a deeper color than liquid
- 1 tsp white vinegar – Reacts with the baking soda for a soft rise
- 1 tsp vanilla extract – For the cake batter
- 1 cup granulated sugar – Sweetens the cake layer
- 1/2 cup unsalted butter, softened – Softened to room temperature so it creams properly
- 2 large eggs – Room temperature for even mixing
- 3 packages (24 oz total) cream cheese, softened – Full-fat brick-style, not spreadable
- 1 cup sour cream – Full-fat; keeps the cheesecake smooth and crack-resistant
- 1 1/4 cups granulated sugar (for cheesecake) – Measured separately from the cake sugar
- 3 large eggs (for cheesecake) – Added one at a time to keep the batter silky
- 2 tsp vanilla extract (for cheesecake) – A little more than in the cake for a pronounced vanilla note
- 1/2 cup heavy cream – Loosens the cheesecake batter slightly for a creamier set
- 8 oz cream cheese, softened (for frosting) – Separate from the cheesecake cream cheese
- 2 cups powdered sugar – Sifted to prevent lumps in the frosting
- 1 tsp vanilla extract (for frosting) – Rounds out the sweetness
- 1/4 cup heavy cream (for frosting) – Makes the frosting spreadable and light
Variations / Substitutions
- No food coloring – The cake will taste exactly the same with a pale brown crumb; skip it if you prefer.
- Gluten-free flour blend – A 1:1 gluten-free flour swap works, though the cake layer will be slightly denser.
- Reduced-fat cream cheese – The cheesecake will set a little softer and may have a slightly grainy texture.
- Dairy-free – Use vegan cream cheese and full-fat coconut cream in place of the sour cream and heavy cream; the cheesecake will be a touch softer but will still slice cleanly.
- Extra cocoa – Swap 1 tbsp of the flour for an extra 1 tbsp of cocoa powder if you want a more pronounced chocolate note in the cake layer.
- No buttermilk on hand – Stir 1 tbsp of white vinegar into 1 cup of whole milk and let it sit for 5 minutes before using.
If you enjoy layered cheesecakes, you might also like a classic New York Style Cheesecake Recipe as a base to riff on.
How To Make Red Velvet Cheesecake
Step 1: Bake the Red Velvet Cake Layers
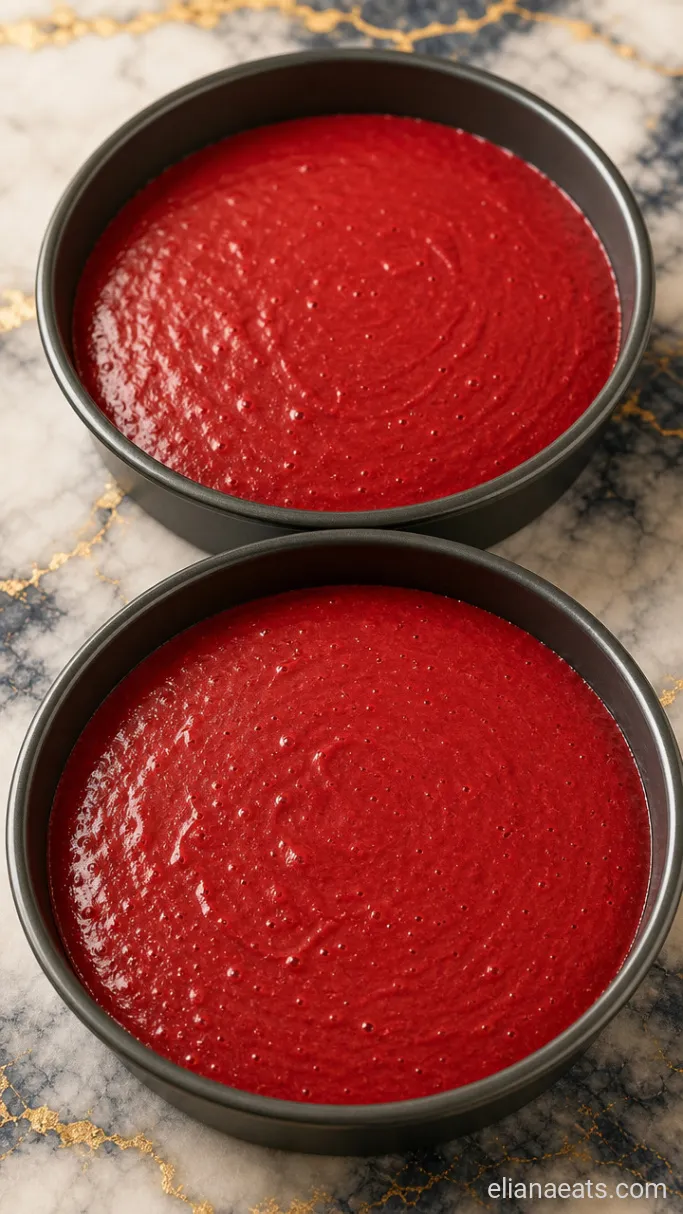
Preheat your oven to 350°F (175°C). Grease two 9-inch round cake pans and line the bottoms with parchment paper. In a medium bowl, whisk together the 2 cups flour, 2 tbsp cocoa powder, 1 tsp baking soda, and 1/2 tsp salt. In a large bowl or stand mixer, beat the 1/2 cup softened butter and 1 cup granulated sugar on medium speed for about 3 minutes, until the mixture looks noticeably lighter and fluffy. Add the 2 eggs one at a time, beating well after each. Stir together the 1 cup buttermilk, 1 tbsp red food coloring, 1 tsp white vinegar, and 1 tsp vanilla extract in a small pitcher. Alternate adding the flour mixture and the buttermilk mixture into the butter-sugar base, starting and ending with the flour, and mixing on low just until each addition disappears.
Divide the batter evenly between the 2 pans and bake for 22 to 25 minutes, until a toothpick inserted into the center comes out with just a few moist crumbs. The tops will spring back lightly when pressed.
Let the layers cool in the pans for 10 minutes, then turn them out onto a wire rack and cool completely before assembling. A warm cake will melt the cheesecake layer, so do not rush this.
Step 2: Beat the Cheesecake Batter
Reduce the oven temperature to 325°F (160°C). In a stand mixer fitted with the paddle attachment, beat the 24 oz softened cream cheese on medium speed for about 3 minutes, scraping the sides twice, until it is completely smooth with no lumps at all. Add the 1 1/4 cups granulated sugar and beat for another 2 minutes. Add the 1 cup sour cream and 2 tsp vanilla extract and mix until combined. Add the 3 eggs one at a time on low speed, mixing only until each one disappears, then pour in the 1/2 cup heavy cream and mix for 30 more seconds on low.
The batter should look glossy and smooth, almost like thick cream. If you see any streaks of unmixed cream cheese along the bowl, scrape them in and give it one more quick mix — those streaks bake into rubbery pockets, and nobody wants that.
Step 3: Bake the Cheesecake Layer
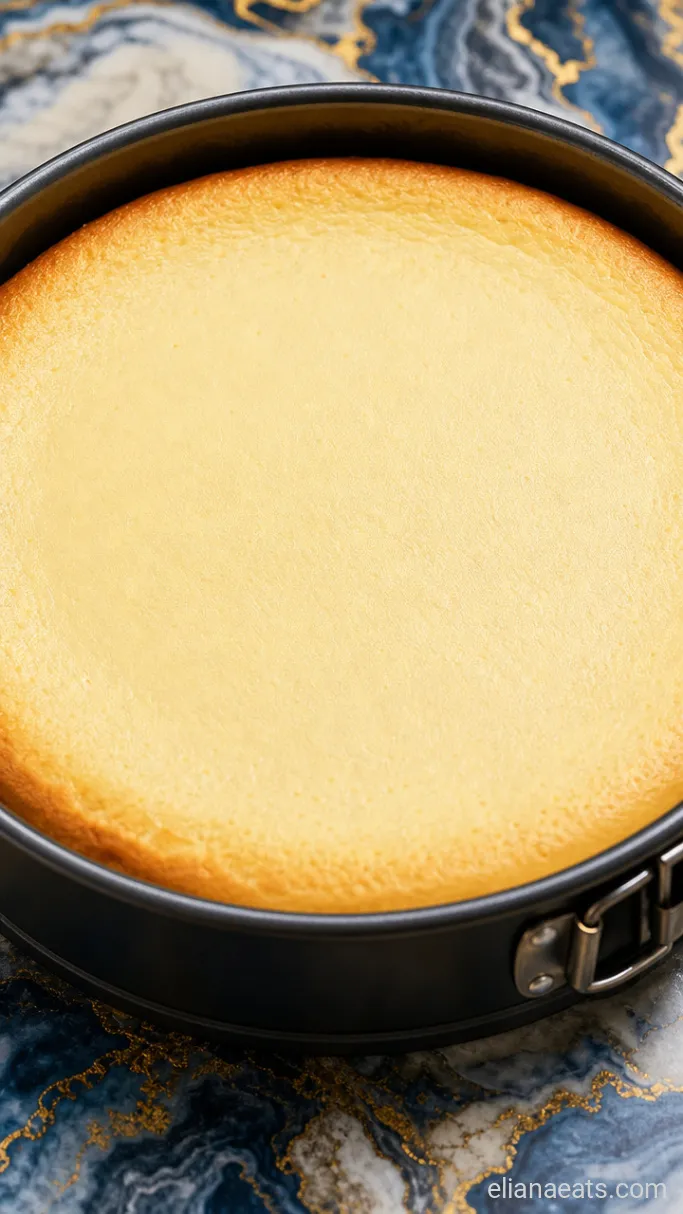
Grease a 9-inch springform pan and line the bottom with parchment. Pour the cheesecake batter into the pan. Place the springform pan inside a larger roasting pan and pour hot water into the roasting pan until it reaches about 1 inch up the side of the springform. Bake at 325°F (160°C) for 55 to 65 minutes. The edges should look set and slightly puffed, and the center should jiggle like firm gelatin when you nudge the pan.
Turn off the oven, crack the door open about 2 inches, and let the cheesecake sit in the oven for 1 hour. This slow cooldown keeps the top smooth. Then transfer it to the counter to cool completely before refrigerating it uncovered for at least 4 hours, or overnight.
The water bath sounds like extra work, but it is the reason the cheesecake comes out without cracks and with that ultra-smooth texture. Wrap the outside of your springform pan tightly in 2 layers of heavy-duty foil before it goes into the water bath — this keeps water out of the pan.
Step 4: Stack and Layer the Cake
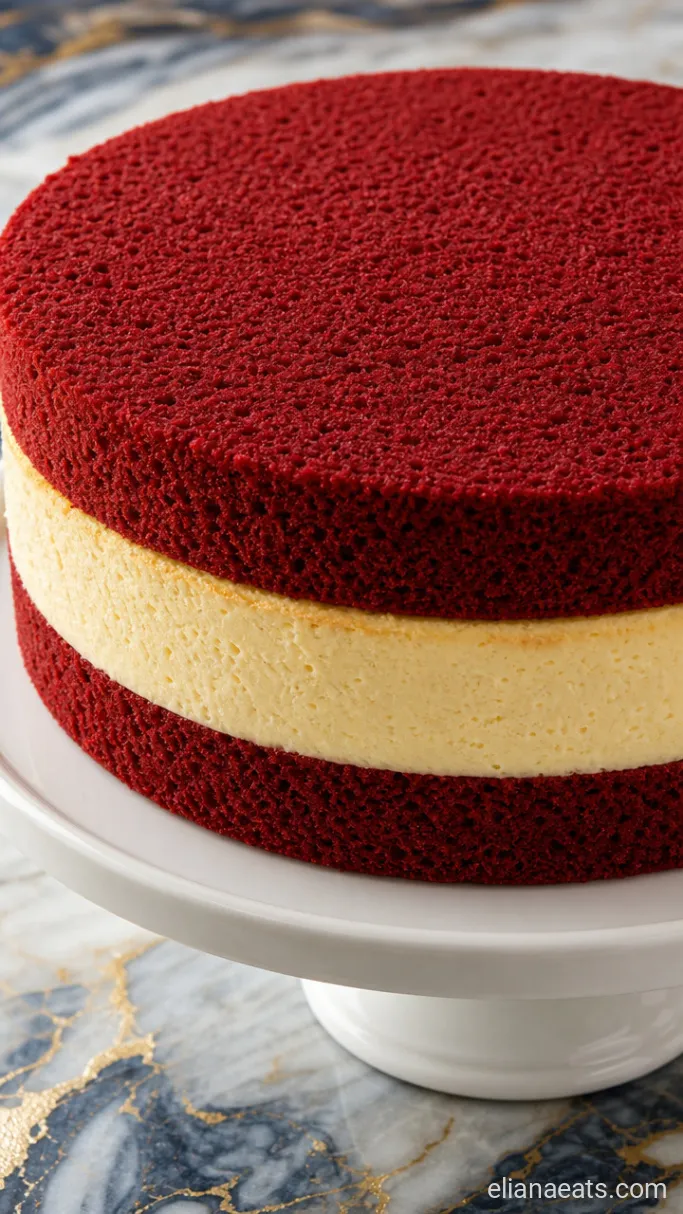
Once both the cake layers and the cheesecake layer are fully chilled, it is time to build. Place 1 red velvet cake layer on your serving plate or cake board, flat side up. Run a thin knife or offset spatula around the edge of the cheesecake and remove the springform ring. Carefully lift the cheesecake out of the pan and set it directly on top of the first cake layer. Then place the second red velvet layer on top of the cheesecake, flat side down. Press gently so the layers sit flush against each other.
The stack should look even and level from the side. If one layer is noticeably domed, use a serrated knife to trim the top flat before stacking — it takes 30 seconds and makes slicing much cleaner.
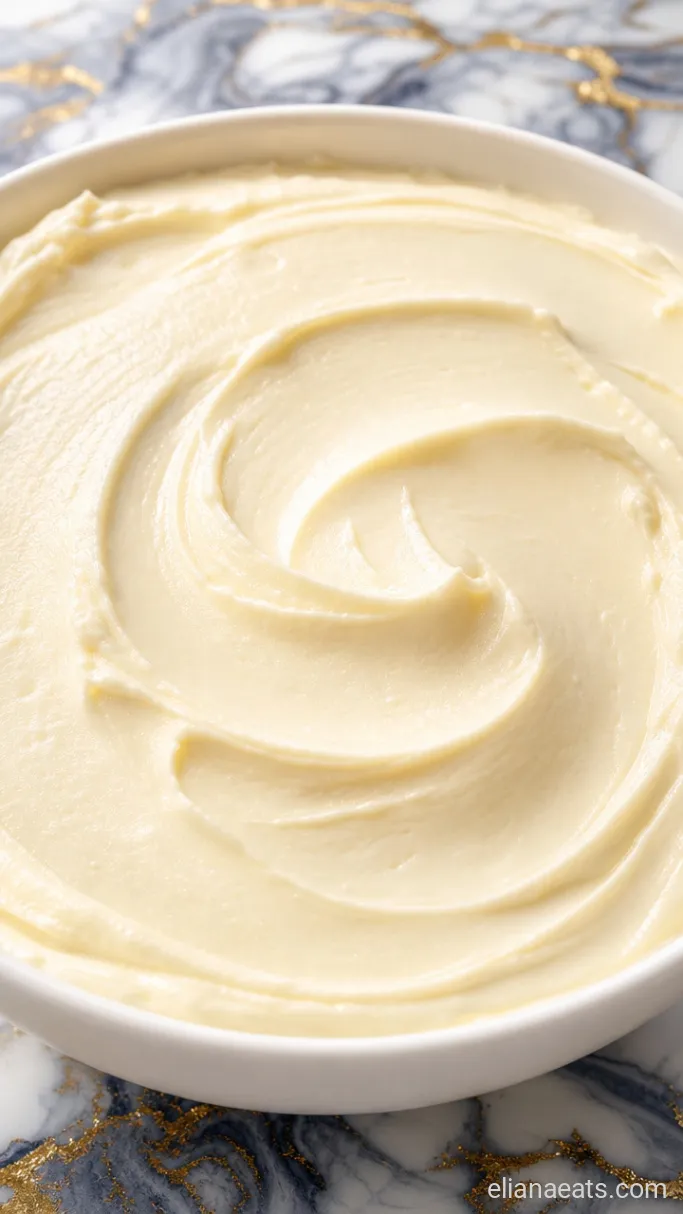
Step 5: Frost and Garnish the Cheesecake
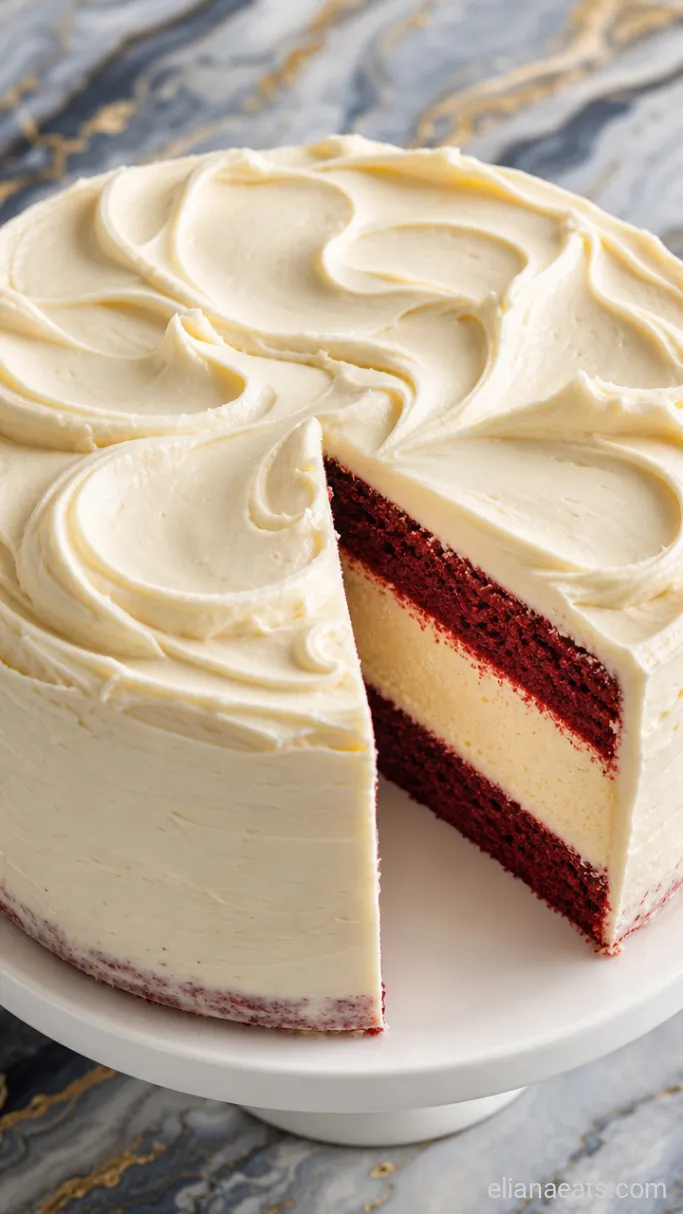
In a stand mixer or with a hand mixer, beat the 8 oz softened cream cheese on medium speed for 2 minutes until smooth. Add the 2 cups sifted powdered sugar and 1 tsp vanilla extract, mixing on low until the sugar is absorbed, then increase to medium-high for 1 minute. Pour in the 1/4 cup heavy cream and beat for another 1 to 2 minutes, until the frosting is fluffy and holds a soft peak.
Spread a generous layer of frosting over the top and sides of the assembled cake using an offset spatula. Work in smooth, even strokes. For the finish Cheesecake Factory is known for, swirl the top with the back of a spoon or pipe rosettes around the top edge. Place the finished cake on its plate, slice one piece away from the whole so that layered cross-section is visible, and serve it at the table.
Recipe Tips
- Trim the cake layers flat – If your red velvet rounds baked up with a dome, a serrated knife levels them in 30 seconds and gives you cleaner, more even slices.
- Room-temperature ingredients – Cold cream cheese beats into lumps that do not smooth out during baking. Pull everything for the cheesecake batter out of the fridge at least 1 hour before you start.
- Chill before slicing – A cheesecake that has not set fully will smear and drag when you cut it. Give it a full 4 hours minimum; overnight is better.
- A hot, dry knife for slicing – Run your knife under hot water and wipe it dry between every cut. This is what gives you those clean, sharp cross-sections with the red and white layers clearly visible.
Cook times by springform pan depth (batter volume is constant at this recipe’s yield):
| Pan Depth | Oven Temp | Bake Time |
|---|---|---|
| 2 inches | 325°F (160°C) | 55 to 60 mins |
| 2.5 inches | 325°F (160°C) | 60 to 65 mins |
| 3 inches | 325°F (160°C) | 65 to 70 mins |
How To Store
- Refrigerate – Cover the cake loosely with plastic wrap or store slices in an airtight container. It keeps well for up to 5 days. The frosting firms up nicely overnight and the flavors deepen.
- Serve Cold – This cake is best served cold or just at the edge of room temperature (about 15 minutes out of the fridge). The cheesecake layer holds its shape much better when it is still cool.
What To Serve With Red Velvet Cheesecake
A strong, unsweetened coffee is the natural pairing here because the slight bitterness cuts through the richness of both the cream cheese frosting and the dense cheesecake layer. A small scoop of vanilla bean ice cream alongside a slice works well, too, since the cold contrast highlights the cocoa note in the cake. For a celebration table, a glass of dry sparkling wine balances the sweetness without competing with the flavors.
Frequently Asked Questions
Can I make this a day ahead?
Yes, and it actually slices better the next day. Assemble and frost the whole cake, then refrigerate it uncovered for the first hour so the frosting firms up before you cover it.
My cheesecake cracked on top. Will it still work in the assembled cake?
Yes. The crack is cosmetic and will be completely hidden once the second red velvet layer sits on top and the frosting covers the sides.
Can I freeze the assembled cake?
You can freeze the red velvet cake layers and the plain cheesecake layer separately, tightly wrapped, for up to 1 month. Thaw both overnight in the fridge before assembling and frosting. The frosting does not freeze well.
Do I have to use a water bath for the cheesecake?
Technically no, but without it the cheesecake is much more likely to crack and the texture tends to be slightly rubbery at the edges rather than smooth all the way through.
Ingredients
Method
- Preheat the oven to 350°F (175°C). Whisk the flour, cocoa powder, baking soda, and salt together. Cream the butter and 1 cup sugar for 3 minutes, add the eggs one at a time, then alternate mixing in the flour mixture and the combined buttermilk, red food coloring, vinegar, and 1 tsp vanilla. Divide between 2 greased, parchment-lined 9-inch pans and bake 22 to 25 minutes. Cool completely.
- Reduce oven to 325°F (160°C). Beat the 24 oz cream cheese for 3 minutes, add the 1 1/4 cups sugar, sour cream, and 2 tsp vanilla, then add the 3 eggs one at a time on low. Stir in the 1/2 cup heavy cream.
- Pour the cheesecake batter into a greased, parchment-lined 9-inch springform pan (wrapped in foil). Set it in a roasting pan with 1 inch of hot water and bake at 325°F (160°C) for 55 to 65 minutes. Cool in the oven with the door cracked for 1 hour, then refrigerate at least 4 hours.
- Place 1 red velvet layer on a cake board. Remove the cheesecake from the springform and set it on top. Place the second red velvet layer on top and press gently to level the stack.
- Beat the 8 oz cream cheese for 2 minutes, add the 2 cups powdered sugar and 1 tsp vanilla, then the 1/4 cup heavy cream, and beat until fluffy. Frost the top and sides of the assembled cake, swirl the top, and slice one piece away to reveal the layers before serving.