14 Healthy High-Fiber Snacks That Support Your Weight Goals

Finding satisfying snacks that actually help with weight management can feel impossible. These fiber-packed treats keep you full longer while satisfying your cravings naturally.
Each recipe transforms simple ingredients into delicious bites that fuel your body without derailing your health goals.
01. Chocolate Chip Banana Bran Muffins

Perfectly moist muffins made with overripe bananas and fiber-rich bran. These treats get even better with a handful of dark chocolate chips mixed in.
Ingredients: 3 overripe bananas (mashed), 1½ cups wheat bran, 1 cup whole wheat flour, ½ cup brown sugar, 2 large eggs, ½ cup unsweetened applesauce, 1 teaspoon baking powder, 1 teaspoon vanilla extract, ½ teaspoon salt, ⅓ cup dark chocolate chips.
How To Make Chocolate Chip Banana Bran Muffins
1. Preheat your oven to 375°F and line a 12-cup muffin tin with paper liners. In a large bowl, mash the bananas until mostly smooth with just a few small lumps remaining for texture.
2. Whisk together the mashed bananas, eggs, applesauce, and vanilla extract until well combined. The mixture should look creamy and uniform throughout.
3. In a separate bowl, combine wheat bran, flour, brown sugar, baking powder, and salt. Stir the dry ingredients into the wet mixture until just combined, then gently fold in chocolate chips.
4. Divide batter evenly among muffin cups, filling each about ¾ full. Bake for 18-22 minutes until tops are golden brown and a toothpick inserted in center comes out with just a few moist crumbs attached.
02. Homemade Oven-Dried Strawberry Chips
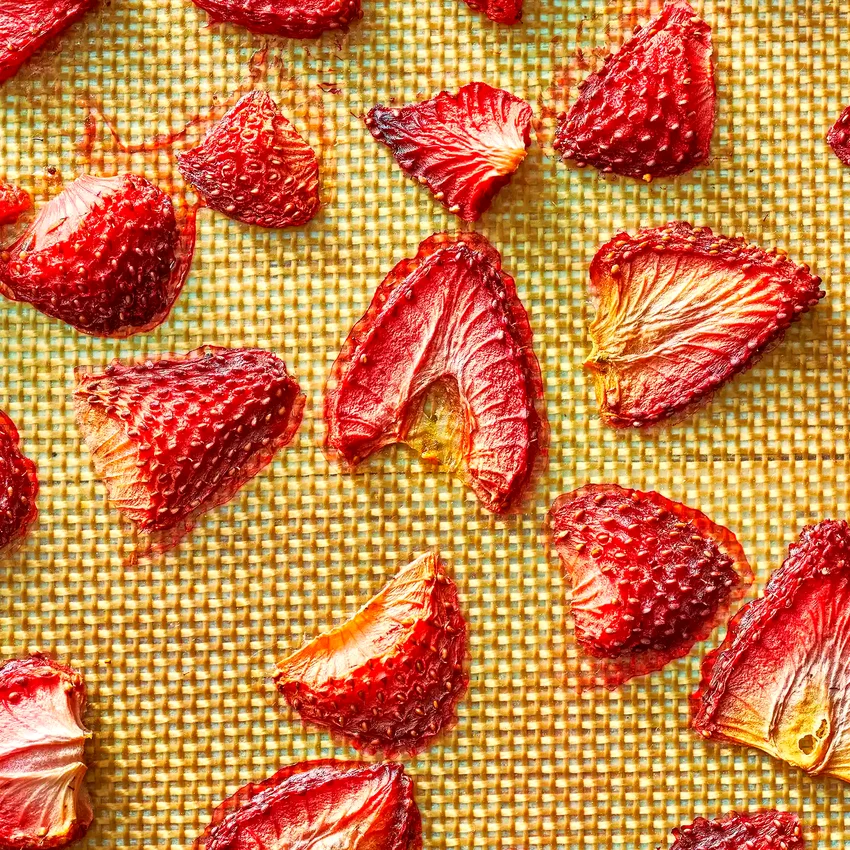
Sweet and tangy strawberry chips with concentrated flavor that beats any store-bought version. Your oven does all the work to create these addictive treats.
Ingredients: 2 pounds fresh strawberries (hulled and sliced ¼-inch thick), 2 tablespoons granulated sugar, 1 tablespoon lemon juice.
How To Make Homemade Oven-Dried Strawberry Chips
1. Preheat your oven to 200°F and line two large baking sheets with parchment paper. Slice strawberries into uniform ¼-inch thick rounds using a sharp knife for even drying.
2. Arrange strawberry slices in a single layer on prepared baking sheets, making sure they don’t overlap. Sprinkle evenly with sugar and drizzle with lemon juice to enhance the natural sweetness.
3. Bake for 2-3 hours, flipping the strawberries halfway through, until they feel leathery but not completely crisp. They’ll continue to dry as they cool.
4. Let cool completely on the baking sheets before storing in an airtight container. They’ll keep for up to one week and make perfect additions to yogurt or trail mix.
5. For extra crispiness, leave them in the turned-off oven with the door slightly open for an additional 30 minutes after baking time is complete.
03. Smoky Eggplant Dip with Fresh Lime
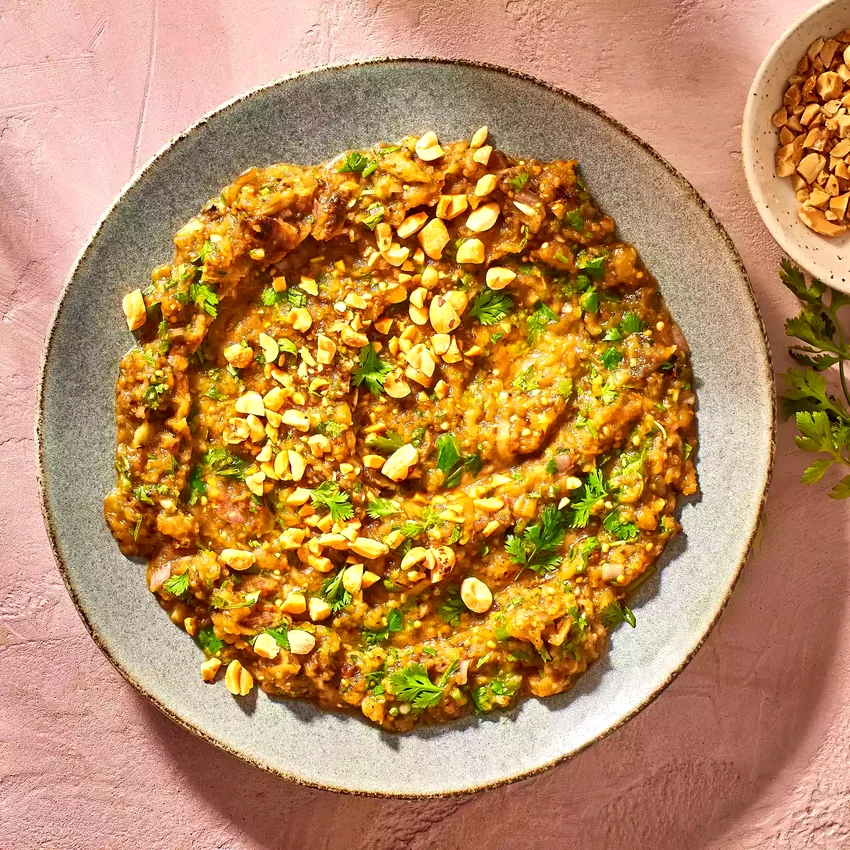
Grilled eggplant creates the perfect smoky base for this creamy, flavorful dip. Serve with fresh vegetables or purple sticky rice for an authentic touch.
Ingredients: 2 large eggplants, 3 cloves garlic (minced), ¼ cup fresh lime juice, ¼ cup fresh cilantro (chopped), 2 tablespoons olive oil, 1 teaspoon salt, ½ teaspoon black pepper, ¼ teaspoon cayenne pepper.
How To Make Smoky Eggplant Dip with Fresh Lime
1. Preheat your grill to medium-high heat. Pierce eggplants all over with a fork to prevent bursting, then grill for 25-30 minutes, turning every 5-7 minutes until the skin is charred and flesh feels very soft when pressed.
2. Let grilled eggplants cool for 10 minutes, then carefully peel away the charred skin. The flesh should scoop out easily and have a smoky aroma that makes this dip special.
3. In a food processor, pulse the eggplant flesh with garlic, lime juice, olive oil, salt, pepper, and cayenne until you reach your desired consistency. I prefer leaving it slightly chunky for texture.
4. Transfer to a serving bowl and fold in fresh cilantro. Taste and adjust seasoning with more lime juice or salt as needed. Serve immediately with cut vegetables or refrigerate for up to 3 days.
04. Air-Fryer Spiced Apple Chips
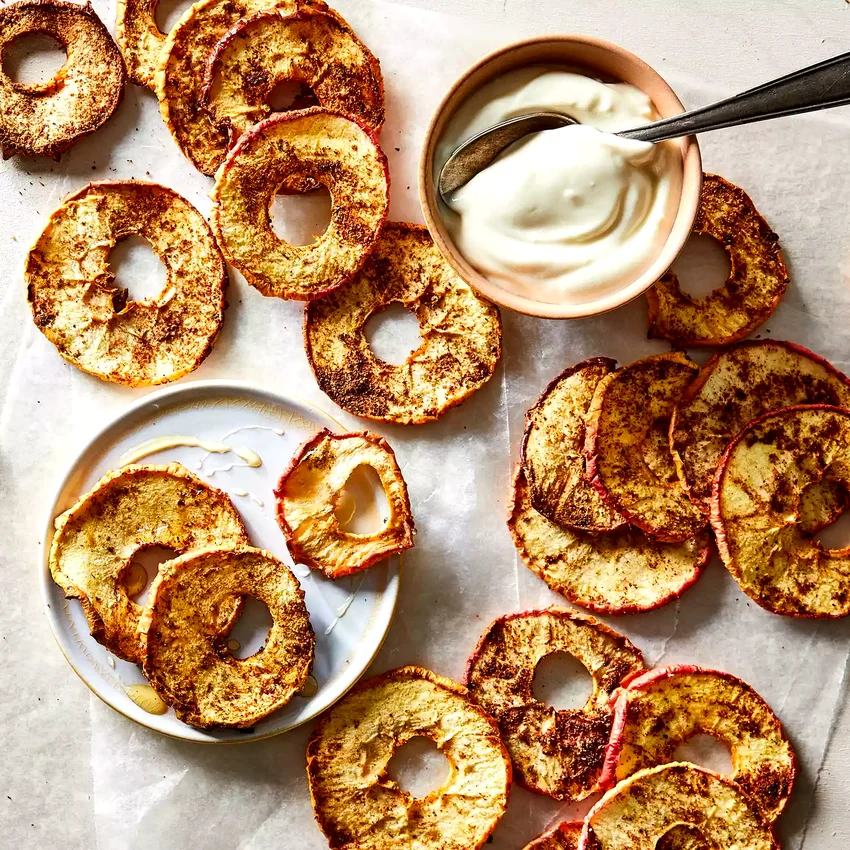
Crispy apple chips seasoned with warming spices make the perfect sweet snack. Your air fryer transforms fresh Honeycrisp apples into irresistible chips in minutes.
Ingredients: 3 large Honeycrisp apples (cored and sliced ⅛-inch thick), 1 teaspoon ground cinnamon, ½ teaspoon ground ginger, ¼ teaspoon ground allspice, ¼ teaspoon ground cloves, ⅛ teaspoon ground nutmeg, ⅛ teaspoon ground cardamom.
How To Make Air-Fryer Spiced Apple Chips
1. Using a mandoline or sharp knife, slice apples into uniform ⅛-inch thick rounds, leaving the skin on for extra fiber and color. Remove any seeds but keep the slices intact.
2. In a large bowl, combine all the spices and toss apple slices until evenly coated. The spices should cling to the natural moisture of the apples.
3. Arrange apple slices in a single layer in your air fryer basket, working in batches if necessary. Cook at 350°F for 12-15 minutes, flipping halfway through, until edges are golden and chips feel crispy.
4. Let cool completely before serving, as they’ll continue to crisp up. Store in an airtight container for up to 5 days, though they’re best enjoyed fresh from the air fryer.
05. Triple Chocolate Peanut Butter Oat Cakes
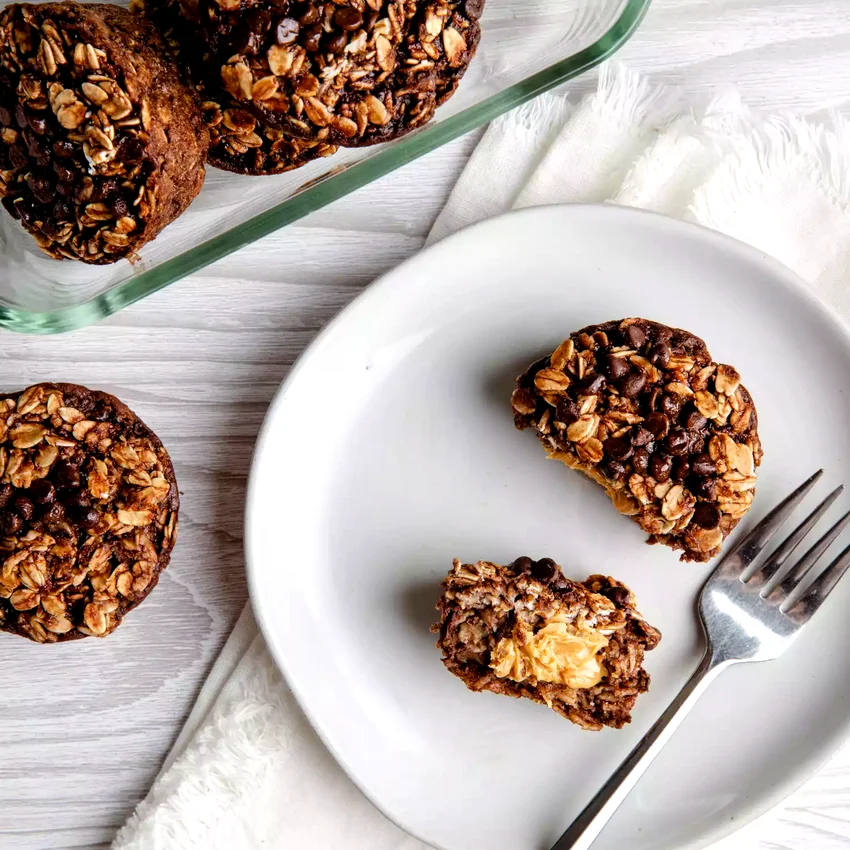
Individual oat cakes packed with banana, chocolate, and peanut butter flavors. These protein-rich treats work perfectly for breakfast or an afternoon energy boost.
Ingredients: 2 ripe bananas (mashed), 1½ cups old-fashioned oats, ⅓ cup natural peanut butter, ¼ cup mini chocolate chips, 2 tablespoons cocoa powder, 2 tablespoons maple syrup, 1 teaspoon vanilla extract, ½ teaspoon baking powder, ¼ teaspoon salt.
How To Make Triple Chocolate Peanut Butter Oat Cakes
1. Preheat oven to 350°F and line a baking sheet with parchment paper. In a large bowl, mash bananas until mostly smooth, leaving a few small chunks for texture.
2. Stir peanut butter, maple syrup, and vanilla into the mashed bananas until well combined. The mixture should be creamy and sweet-smelling.
3. In a separate bowl, whisk together oats, cocoa powder, baking powder, and salt. Add dry ingredients to wet ingredients and mix until just combined, then fold in chocolate chips.
4. Using a ¼-cup measure, scoop mixture onto prepared baking sheet, spacing cakes about 2 inches apart. Gently flatten each cake with the back of a spoon.
5. Bake for 15-18 minutes until edges are set and centers spring back when lightly touched. Cool on baking sheet for 5 minutes before transferring to a wire rack.
06. Blueberry-Pecan Chocolate Energy Balls
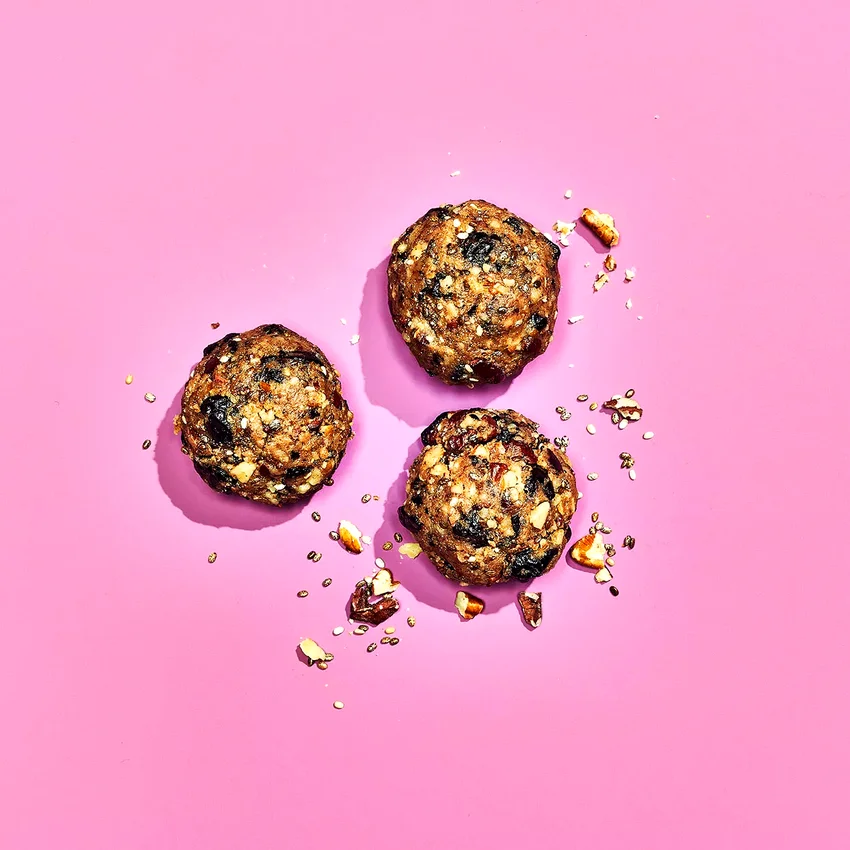
No-bake energy balls combining dried blueberries, pecans, and cacao nibs for natural sweetness. These protein-packed bites fuel your body with wholesome ingredients.
Ingredients: 1 cup pitted dates, ½ cup raw pecans, ⅓ cup dried blueberries, ¼ cup almond butter, 2 tablespoons cacao nibs, 2 tablespoons chia seeds, 2 tablespoons maple syrup, 1 teaspoon vanilla extract, ¼ teaspoon salt.
How To Make Blueberry-Pecan Chocolate Energy Balls
1. In a food processor, pulse dates until they form a sticky paste, stopping to scrape down sides as needed. This creates the natural binding agent for your energy balls.
2. Add pecans and pulse until roughly chopped, leaving some larger pieces for texture. Then add dried blueberries and pulse just a few times to incorporate without completely breaking them down.
3. Add almond butter, maple syrup, vanilla, and salt to the processor and pulse until mixture holds together when pressed. If too dry, add maple syrup one teaspoon at a time.
4. Transfer mixture to a bowl and stir in cacao nibs and chia seeds by hand. Using clean hands, roll mixture into 16 small balls, each about 1 tablespoon in size.
5. Place energy balls on a parchment-lined plate and refrigerate for at least 30 minutes to firm up. Store in refrigerator for up to one week in an airtight container.
07. High-Protein Banana Breakfast Muffins
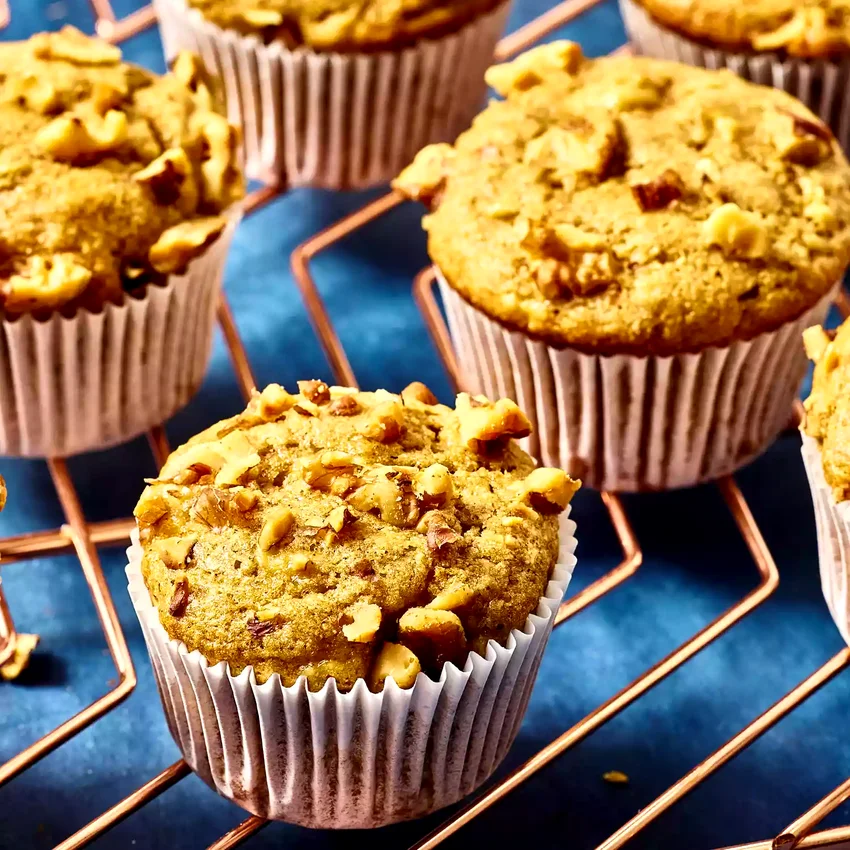
Protein-packed muffins featuring Greek yogurt and peanut butter for lasting energy. White whole-wheat flour adds fiber while keeping these muffins tender and delicious.
Ingredients: 3 ripe bananas (mashed), ½ cup plain Greek yogurt, ⅓ cup natural peanut butter, 2 large eggs, ¼ cup honey, 1½ cups white whole-wheat flour, 1 teaspoon baking soda, ½ teaspoon salt, 1 teaspoon vanilla extract.
How To Make High-Protein Banana Breakfast Muffins
1. Preheat oven to 350°F and line a 12-cup muffin tin with paper liners. In a large bowl, whisk together mashed bananas, Greek yogurt, peanut butter, eggs, honey, and vanilla until smooth and creamy.
2. In a separate bowl, whisk together flour, baking soda, and salt. Gradually fold dry ingredients into wet ingredients using a rubber spatula, mixing just until flour disappears to avoid tough muffins.
3. Divide batter evenly among muffin cups, filling each about ¾ full. The batter will be thick but should spread slightly in each cup.
4. Bake for 18-22 minutes until tops are golden brown and a toothpick inserted in center comes out clean or with just a few moist crumbs.
5. Cool in pan for 5 minutes before transferring to a wire rack. These muffins stay moist for days and freeze beautifully for grab-and-go breakfasts.
08. Crispy Buffalo Roasted Chickpeas
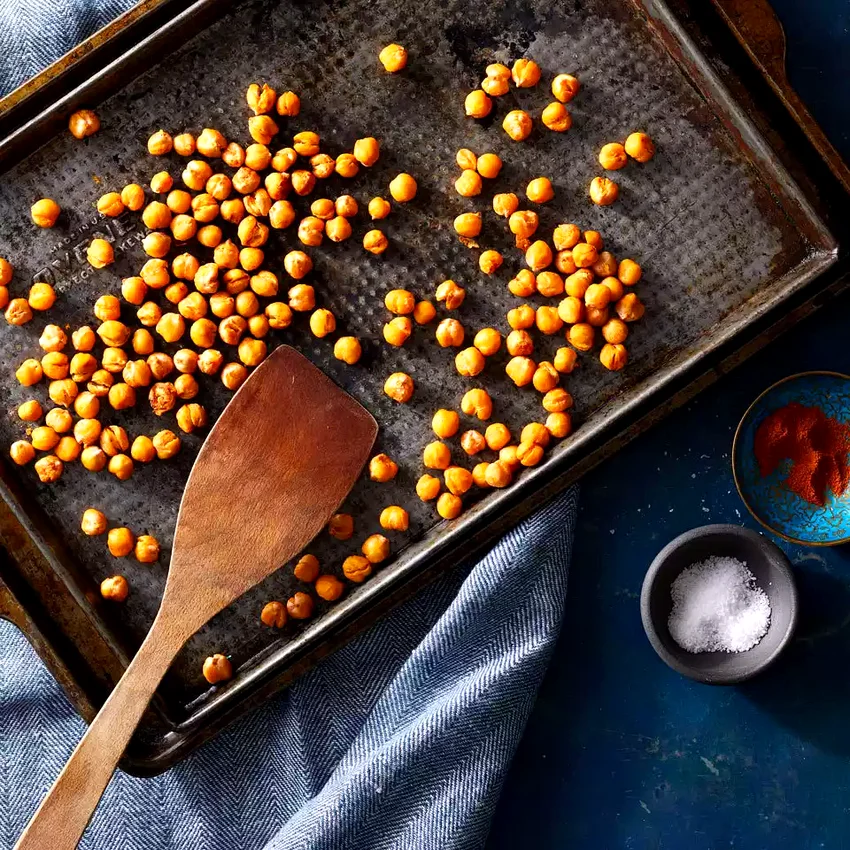
Addictively crunchy chickpeas with tangy buffalo flavor that satisfies chip cravings. Soaking in hot sauce before roasting creates the perfect balance of heat and crunch.
Ingredients: 2 cans chickpeas (drained and rinsed), ¼ cup buffalo hot sauce, 2 tablespoons olive oil, 1 teaspoon garlic powder, ½ teaspoon onion powder, ½ teaspoon smoked paprika, ¼ teaspoon salt.
How To Make Crispy Buffalo Roasted Chickpeas
1. Preheat oven to 400°F and line a large baking sheet with parchment paper. Pat chickpeas completely dry with paper towels, then let them air dry for 10-15 minutes for maximum crispiness.
2. In a large bowl, toss dried chickpeas with buffalo sauce, making sure each chickpea is coated. Let them marinate for 15 minutes to absorb the tangy flavor.
3. Add olive oil, garlic powder, onion powder, paprika, and salt to the chickpeas and toss until evenly distributed. The seasonings should stick to the buffalo-coated chickpeas.
4. Spread chickpeas in a single layer on prepared baking sheet, making sure they don’t overlap. Roast for 25-30 minutes, shaking the pan every 10 minutes, until golden brown and crispy.
5. Let cool completely on the baking sheet before serving, as they’ll continue to crisp up. Store in an airtight container for up to 3 days, though they’re best enjoyed fresh.
09. Bright Blueberry-Lemon Energy Bites
Refreshing energy balls with dried blueberries and bright lemon flavor. Walnuts provide plant-based protein while maple syrup adds natural sweetness to these quick snacks.
Ingredients: 1 cup pitted dates, ¾ cup raw walnuts, ⅓ cup dried blueberries, 2 tablespoons maple syrup, 1 tablespoon fresh lemon juice, 1 teaspoon lemon zest, ½ teaspoon vanilla extract, ¼ teaspoon salt.
How To Make Bright Blueberry-Lemon Energy Bites
1. Process dates in a food processor until they form a sticky paste, scraping down sides as needed. This takes about 1-2 minutes and creates the base that holds everything together.
2. Add walnuts to the processor and pulse until roughly chopped, leaving some larger pieces for texture. You want a mix of fine and coarse pieces rather than a smooth paste.
3. Add dried blueberries and pulse just a few times to break them up slightly while keeping some whole berries for bursts of flavor in each bite.
4. Add maple syrup, lemon juice, lemon zest, vanilla, and salt. Process until mixture holds together when pressed between your fingers, adding more maple syrup if needed.
5. Roll mixture into 14-16 small balls using clean hands. Place on a parchment-lined plate and refrigerate for 30 minutes to firm up before serving or storing.
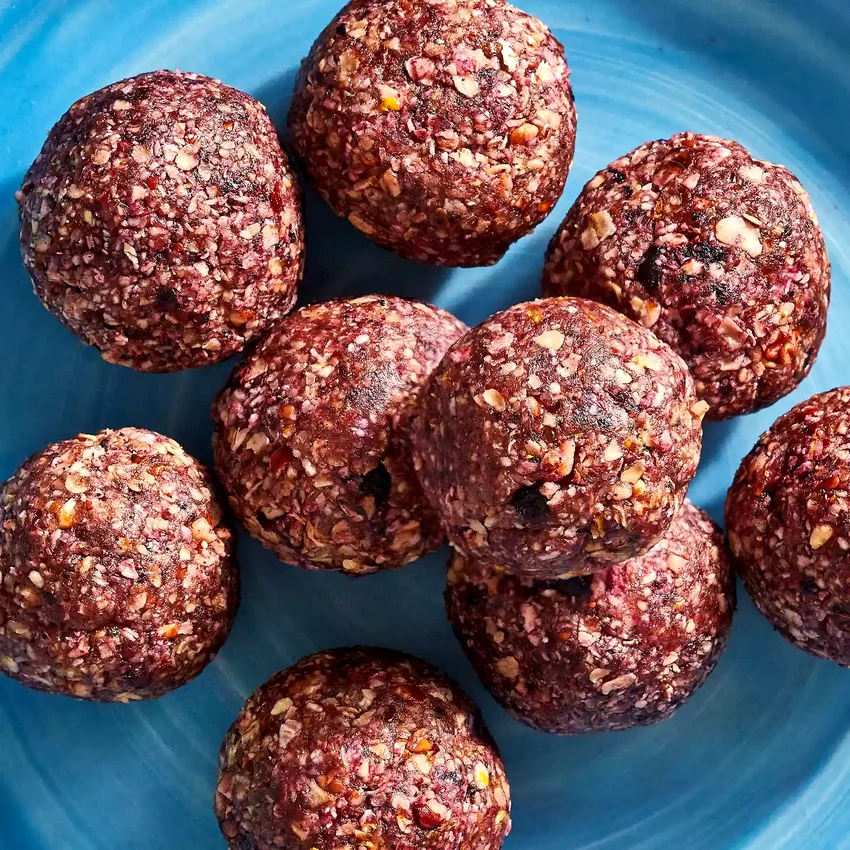
10. Cranberry-Almond Power Balls
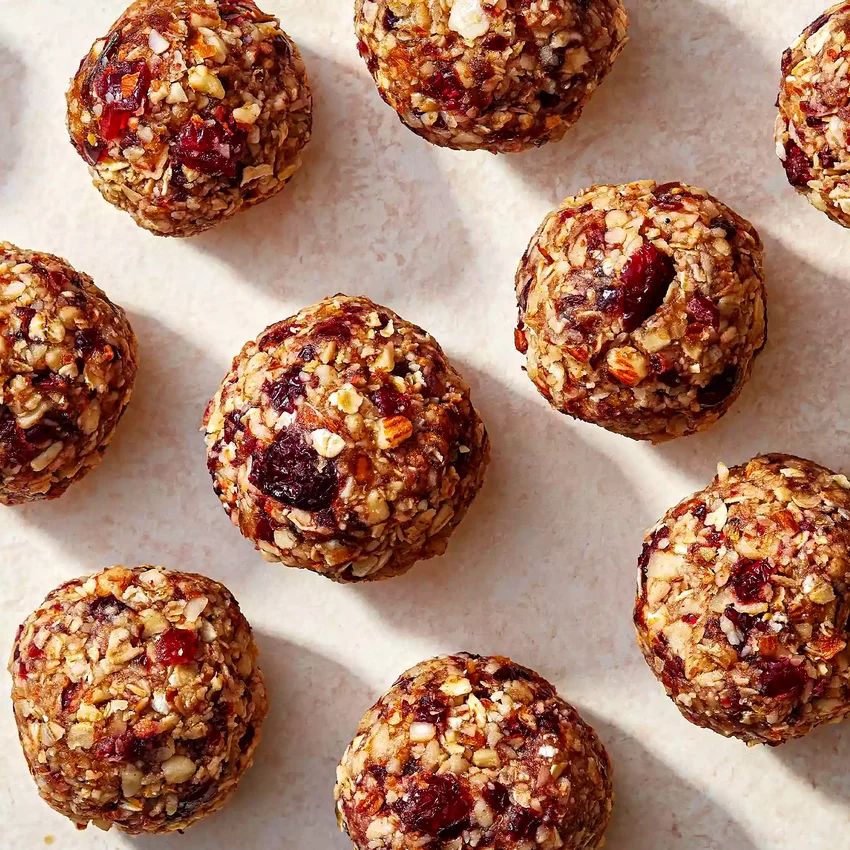
Make-ahead energy balls packed with cranberries, almonds, oats, and dates for sustained energy. Tahini and maple syrup bind everything together with complex flavors.
Ingredients: 1 cup pitted dates, ½ cup raw almonds, ½ cup old-fashioned oats, ⅓ cup dried cranberries, 3 tablespoons tahini, 2 tablespoons maple syrup, 1 teaspoon vanilla extract, ¼ teaspoon salt.
How To Make Cranberry-Almond Power Balls
1. In a food processor, pulse dates until they break down into a sticky paste that will act as the natural binder for these energy balls. Scrape sides as needed.
2. Add almonds and oats to the processor and pulse until roughly chopped, maintaining some texture rather than creating a fine powder. This gives the balls a satisfying bite.
3. Add cranberries and pulse briefly to chop them slightly while leaving some whole pieces for tart flavor bursts throughout each ball.
4. Add tahini, maple syrup, vanilla, and salt. Process until mixture holds together when squeezed, adding more maple syrup one teaspoon at a time if mixture seems too dry.
5. Using clean hands, roll mixture into 15-18 balls, each about 1 tablespoon in size. Refrigerate on a parchment-lined plate for at least 1 hour before storing in an airtight container.
6. These energy balls keep in the refrigerator for up to one week and make perfect grab-and-go snacks for busy days or pre-workout fuel.
11. Perfectly Crispy Baked Kale Chips
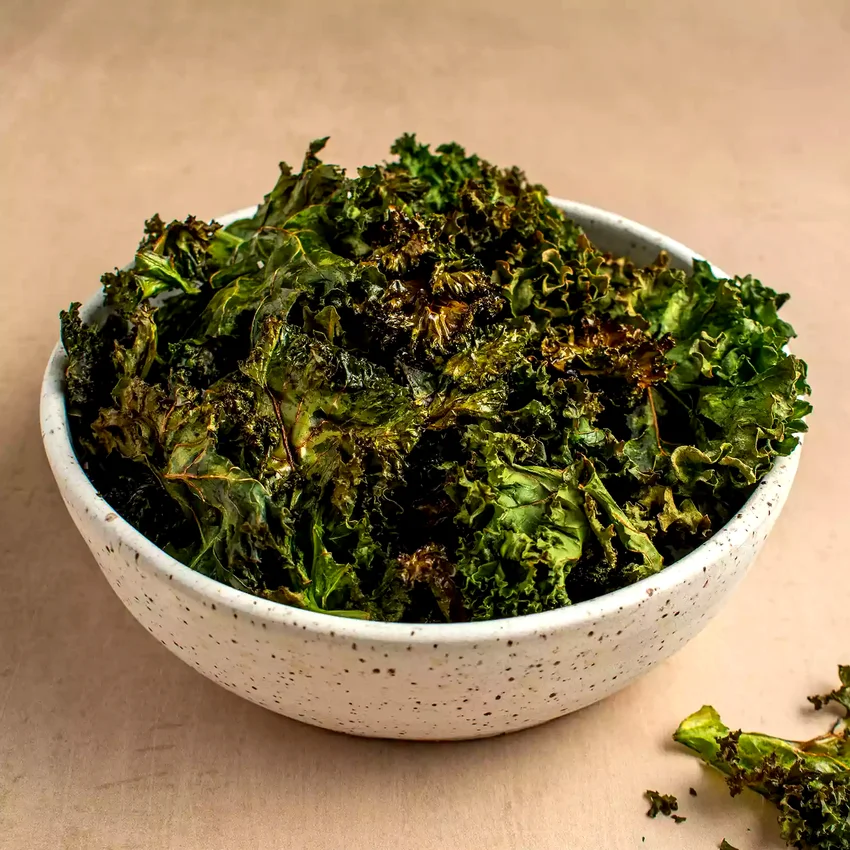
Ultra-crispy kale chips that convert even the biggest kale skeptics. The secret is proper spacing and not overcrowding your baking pans for maximum crunchiness.
Ingredients: 1 large bunch curly kale (stems removed, leaves torn into bite-sized pieces), 2 tablespoons olive oil, ½ teaspoon sea salt, ¼ teaspoon garlic powder, ¼ teaspoon onion powder.
How To Make Perfectly Crispy Baked Kale Chips
1. Preheat oven to 300°F and line two large baking sheets with parchment paper. Remove thick stems from kale and tear leaves into uniform 2-3 inch pieces for even cooking.
2. Wash kale thoroughly and dry completely using a salad spinner or paper towels. Any remaining moisture will prevent the chips from getting crispy, so this step is crucial.
3. In a large bowl, massage kale pieces with olive oil using your hands for 2-3 minutes until leaves are well-coated and slightly softened. This helps seasonings stick better.
4. Sprinkle with salt, garlic powder, and onion powder, then toss to distribute evenly. Arrange in a single layer on prepared baking sheets without overlapping pieces.
5. Bake for 20-25 minutes until edges are crispy and chips feel dry to the touch, rotating pans halfway through for even browning. Serve immediately for best texture.
12. Peachy Oatmeal Breakfast Bars
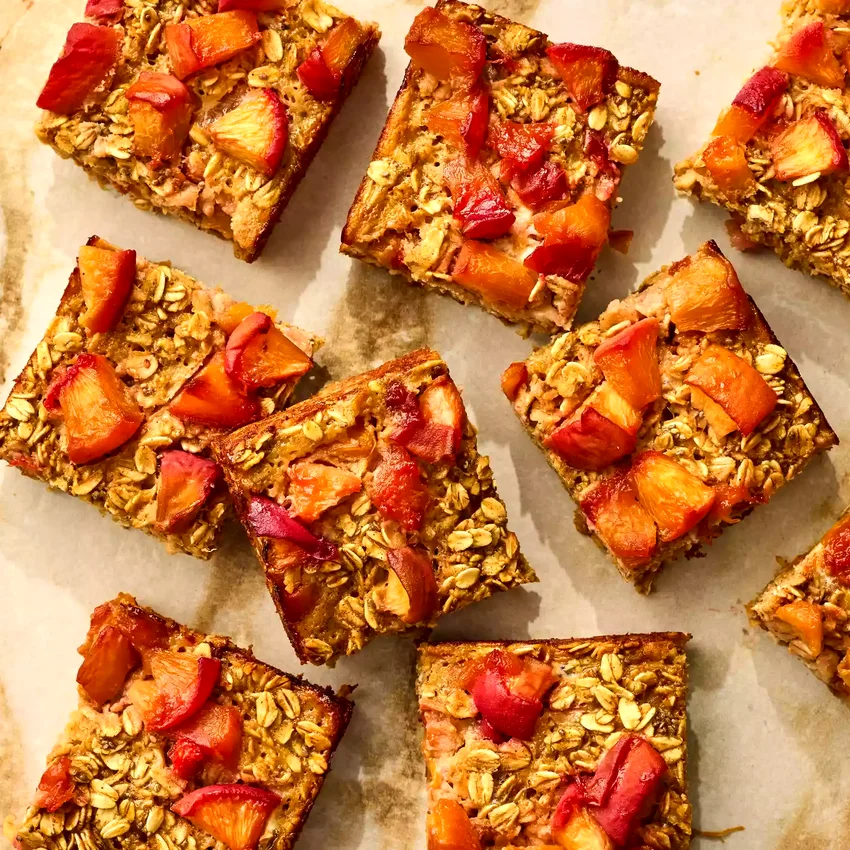
Fiber-rich oatmeal bars studded with sweet peaches and brown sugar. These portable bars hold together beautifully, making them perfect for busy morning grab-and-go situations.
Ingredients: 2 cups old-fashioned oats, 1 cup whole wheat flour, ½ cup brown sugar, ½ cup unsweetened applesauce, 2 large eggs, 1½ cups diced fresh peaches, ¼ cup honey, 1 teaspoon vanilla extract, 1 teaspoon cinnamon, ½ teaspoon baking powder, ¼ teaspoon salt.
How To Make Peachy Oatmeal Breakfast Bars
1. Preheat oven to 350°F and line an 8×8-inch baking pan with parchment paper, leaving overhang for easy removal. Dice peaches into small, uniform pieces to distribute evenly throughout bars.
2. In a large bowl, whisk together oats, flour, brown sugar, cinnamon, baking powder, and salt until well combined and no lumps remain.
3. In a separate bowl, whisk together applesauce, eggs, honey, and vanilla until smooth. Pour wet ingredients into dry ingredients and stir until just combined.
4. Gently fold in diced peaches, being careful not to overmix. The batter should be thick but spreadable, with peaches distributed throughout.
5. Press mixture evenly into prepared pan using the back of a spoon or offset spatula. Bake for 25-30 minutes until top is golden brown and edges pull slightly away from sides.
6. Cool completely in pan before lifting out using parchment overhang and cutting into 9 bars. These stay fresh for up to 5 days wrapped individually.
13. Tropical Key Lime Energy Balls
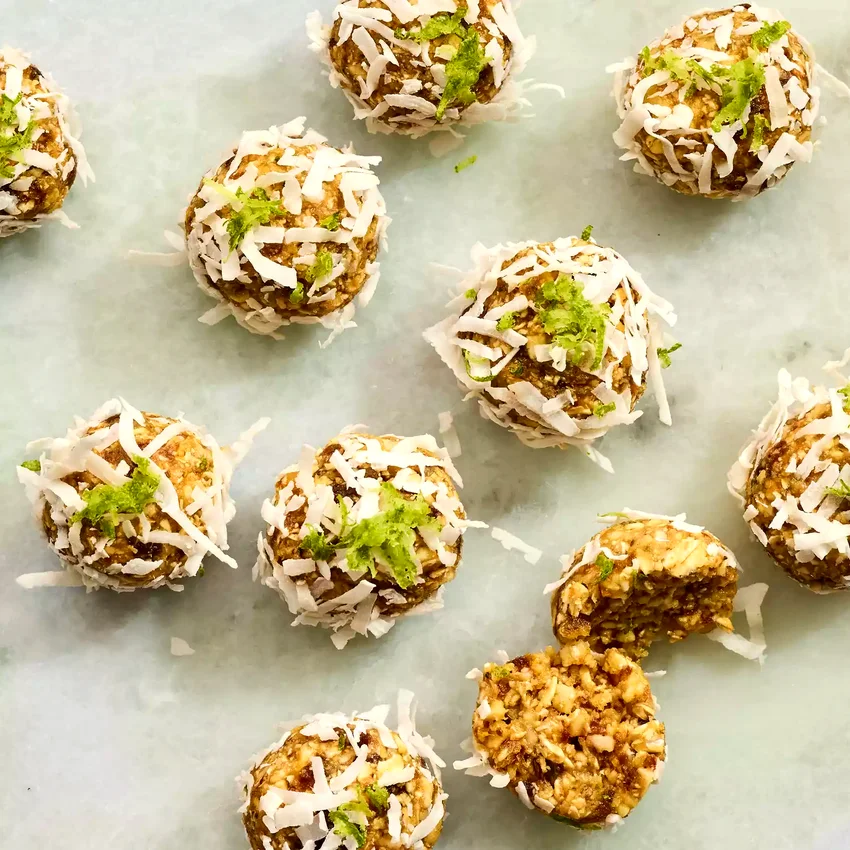
Bright, zesty energy balls capturing classic Key lime pie flavors in every bite. Dates, cashews, and coconut create the perfect sweet-tart balance with tropical flair.
Ingredients: 1 cup pitted dates, ¾ cup raw cashews, ¼ cup unsweetened shredded coconut, 3 tablespoons fresh Key lime juice, 1 tablespoon Key lime zest, 2 tablespoons maple syrup, ½ teaspoon vanilla extract, ¼ teaspoon salt.
How To Make Tropical Key Lime Energy Balls
1. Process dates in a food processor until they form a sticky paste, stopping to scrape down sides every 30 seconds. This creates the natural sweetness and binding power for the balls.
2. Add cashews and process until finely ground but not completely smooth, leaving some small pieces for texture. The mixture should look like coarse meal with some larger bits.
3. Add coconut, Key lime juice, lime zest, maple syrup, vanilla, and salt. Process until mixture holds together when pressed, adding more lime juice if needed for proper consistency.
4. Using clean hands, roll mixture into 14-16 small balls, each about 1 tablespoon in size. The mixture should hold together easily without being too sticky.
5. Roll each ball in additional shredded coconut if desired for extra tropical flavor and attractive presentation. Refrigerate for 30 minutes to firm up before serving.
14. Air-Fryer Perfectly Crunchy Chickpeas
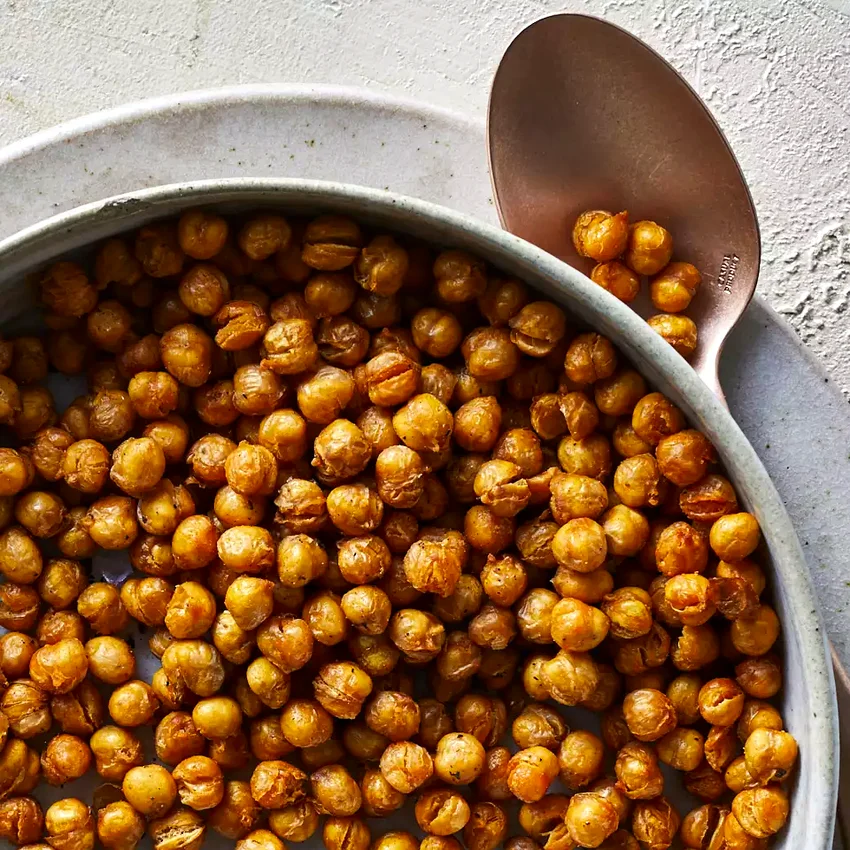
Intensely flavored, incredibly crunchy chickpea snacks made effortlessly in your air fryer. Proper drying before cooking ensures the ultimate crispy texture every time.
Ingredients: 2 cans chickpeas (drained and rinsed), 2 tablespoons olive oil, 1 teaspoon smoked paprika, 1 teaspoon garlic powder, ½ teaspoon ground cumin, ½ teaspoon salt, ¼ teaspoon black pepper, ¼ teaspoon cayenne pepper.
How To Make Air-Fryer Perfectly Crunchy Chickpeas
1. Drain and rinse chickpeas thoroughly, then pat completely dry with paper towels. Spread them on a clean kitchen towel and let air dry for 1-2 hours if you have time for maximum crispiness.
2. Remove any loose skins that come off easily during drying, as these can burn during cooking. The cleaner your chickpeas, the better the final texture will be.
3. In a large bowl, toss dried chickpeas with olive oil until evenly coated. Add all spices and toss again until chickpeas are uniformly seasoned and aromatic.
4. Cook in air fryer at 380°F for 12-15 minutes, shaking basket every 4-5 minutes to ensure even browning. Chickpeas should be golden brown and feel very crispy when done.
5. Let cool for 5 minutes before tasting and adjusting seasoning if needed. Store in an airtight container for up to 4 days, though they’re best enjoyed within 24 hours for optimal crunch.
Final Thoughts
These fiber-rich snacks prove healthy eating doesn’t mean sacrificing flavor or satisfaction. Each recipe offers a perfect balance of nutrients and taste that supports your wellness journey.
Keep these wholesome treats on hand for those moments when cravings strike, knowing you’re fueling your body with ingredients that truly nourish.